Monday, June 28, 2010

The Bacon Explosion....that exploded!

Ok, well, technically it didn’t “explode”.

As I posted recently, I had a secret plan in place to serve up a special meal for the hubs on Fathers Day. This scheme involved me “rolling a fatty”, which basically entails weaving a bunch of raw bacon together,seasoning it with your favorite barbeque seasoning,topping it with Italian sausage, various levels of barbeque seasoning and sauce, more bacon, and in our case, jalapeƱos.Then, rolling it all up into a “fatty” or “log”, adding more seasoning, and smoking it for a couple of hours,then basting it with more sauce to give it a good glaze.

Then the man of the house royally pissed me off.

I don’t normally get into my tiffs with the hubs (and believe me, we have our share) on here, but I just gotta say, he was really in the dog house. Without getting into details, we’ll just say he didn’t come home when he was supposed to (yes, I know, it was Fathers Day, and he should get to do what he wants, and I agree...to a point. Let’s just say, he pushed it a little too far that day.) In any case, by the time he finally got home (and yes, he knew this was going to take a couple of hours to smoke) it was 8:00pm. By the time the charcoal was going, it was 8:30.

Let me also add that I was sick as a dog with a 102 fever most of the day, at home with our 5 year old, so he could spend the day out with his buddies, so I was not feeling very tolerant by the time he graced us with his presence.

AND. He was a tad drunk. Yeah, spending the day at the bar will do that to a person. (and no, in case you’re wondering, he did not drive himself home. I pre-arranged that to avoid any potential issues.) That being said, my husband is bad at following directions when he’s sober. And, he’s a flipper.

You know the type....puts a burger on the grill, then flips it every five seconds instead of letting it sear, and then wonders why it falls apart on the grill. He does it to me, too. I’ll be cooking something (steaks or chops, or whatever...) and when I’m cleaning a platter, or feeding our son, or any other opportunity he can see where I have my back turned, he steps up tot eh stove and FLIPS whatever I’m cooking, whether it needs it or not. It drives me insane. I am constantly yelling at him to leave it alone. Completely ruins some of my dishes because they never get a chance to sear or caramelize or whatever it may be that they need to do in order to be successful dishes. He’s a stirrer, too.... but that’s a story for another time.

Moving right along....so, since he’s bad at listening.....half drunk.....grilling in the dark.....rushing because the wife is pissed off at him....and on top of everything else, he’s a FLIPPER.....what do you suppose happened to the Bacon Explosion?

Yeah, it fell apart. Admittedly, it had good flavor....but it fell apart. And, it got “done” in a little over an hour, when it should have smoked for at least two. I was so ticked off, that not only did I refuse to try it that night, I went to bed and left him on the deck to finish it himself, with some nasty words left ringing in his ears. Suffice it to say, that Fathers Day will NOT go down in the history books under my list of “best days ever”.

Then... we have my “girls weekend”.

Ginny came out for a quick visit this weekend, and, among all of our other projects that you’ll soon be hearing about, I went about setting things right in the world of pork-love.

I got the ingredients...again.
I rolled the fatty...again.
And we fired up the grill...again.

This time? It was a big fat log of pure pork-a-liciousness.

We were patient... we were gentle.... and we were rewarded for it... with THIS:Bacon Explosion.....we love you.

Tuesday, June 22, 2010

The Ten Spot – Mad Housewife Cabernet Sauvignon

The Ten Spot – Mad Housewife Cabernet Sauvignon $5.99
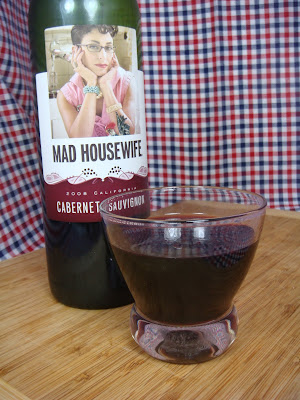
Another new acquisition by my local grocer, four wines under the Mad Housewife label. I chose the Cabernet because, frankly, I can generally drink a Cab at room temperature and I was wanting a bottle of wine to drink immediately. Yep, that’s the kind of mood I was in that day. Plus, I always like to at least try one bottle of any new wine they get, just to say “thanks for getting something new, and please keep getting new things” to my friendly neighborhood grocer.
How was it? It was fine. It wasn’t exciting or unique in anyway. It was a standard Cabernet, fairly tannic, but easy to drink. Nothing special, but for $5.99 a bottle, I’ll probably buy it again when I need a bottle right away, or maybe just because I’m walking down that aisle at the store.....

Saturday, June 19, 2010

Of Wine and Words – June 2010

Some time ago, I promised to keep you all current on the goings-on at my little book club, Of Wine and Words. Well, the spring has been a little busy and we’ve had to cancel twice now because of weddings I was performing. Finally, however, we were able to get together last Friday night at Mendi’s house, and instead of getting further behind, we opted to go ahead and discuss both books we had read at the same time.

Our book pick for April was The Poisonwood Bible by Barbara Kingsolver. This book came to me highly recommended by my sister. Unfortunately, I positively hated the book. Sorry, sis. As I have absolutely nothing good to say about the book, except that thanks to www.PaperbackSwap.com I now own a very nice first edition of it, I decided that I would let Whitney share a little review of the book with us, from HER point of view.

Our pick for May was The Last Chinese Chef. This came from my personal wish list since I intended to read it for Cook the Books but didn’t get it done in time, so I have been dying to read it ever since. All three of us were mesmerized by this book. The depictions of the characters and the recurring theme of family in the Chinese culture took us by surprise. The history of food and its evolution in China overwhelmed our senses. It was so well written, we thought we were there.

I should mention that my little group seems to have a curse. Pretty much every other book we read, we love. The others, we hate. For example:

October 2009 - Five Smooth Stones by Ann Fairbairn – Loved it!
November 2009 - Love Walked In by Marisa de los Santos – eh...not such a good choice.
January 2010 - Pillars of the Earth by Ken Follett – Phenomenal book – loved it.
February 2010 - The Optimist’s Daughter by Eudora Welty (Nobel Prize Winner)– hated it so much we almost couldn’t finish it
March 2010 - The Red Tent by Anita Diamant – Loved it!
April 2010 - The Poisonwood Bible by Barbara Kingsolver– Yeah, hated it.
May 2010 - The Last Chinese Chef by Nicole Mones– LOVED it!


Coming up:
July 2010 – Drowning Ruth by Christina Schwarz
August 2010 – Wishful Drinking by Carrie Fisher

Being as we have this curse bestowed upon us somehow, I am hoping that Drowning Ruth can break the curse, otherwise, it could be a very long read. Wish us luck!

In the meantime, here is a quick review from Whitney on The Poisonwood Bible. Although in the end, she recommends the book (and doesn’t hate it quite as vehemently as I did) we all agreed that this was not one that we particularly enjoyed as a group.

When our book club selected The Poisonwood Bible to read, a sense of dread came over me because the book tells the story of a family of missionaries in Uganda during the 1950’s. For those of you who don’t know, I was born and raised in the church. I love the Lord and actually enjoy attending church and reading scripture. However, if there is something that sits wrong with me in overall religious structure, it’s missionaries. I’m close to a few missionaries from my home congregation so it actually pains me to take such a strong stance on this. I understand that Psalm 9:11 says, “Proclaim among the nations what he has done and Mark 13:10 says, “And the gospel must first be preached to all nations.” This scripture is basically telling us to spread the good news , but let me present you with a couple of questions: The Bible is a book written by man, do we really know if we’re correctly interpreting what God wants and who are we to walk into another country and tell a group of people that their beliefs are wrong? Now you all have a good idea why I was not looking forward to reading this book and surprisingly I enjoyed reading this book. Kingsolver breaks down the book into a series of vignettes told from the women characters’ perspective. The book begins with Oleanna, the matriarch, speaking of Africa. I assumed that Kingsolver would depict her as a typical minister’s wife, meaning she would be at her husband’s beck and call and be seen and not heard. Boy was I ever wrong! I’ve read many reviews where critics say the author doesn’t take the time to let their characters evolve, but Kingsolver did just the opposite. Orleanna began as the stereotypical minister’s wife and evolved into a strong woman that wouldn’t take any crap off of Nathan. Rachel is the eldest of the girls and she is the typical teenager of the 1950’s. All she cared about was having a monumental sweet sixteen party and a pink cashmere sweater set. Her vanity was so strong at times that you wanted to smack her and say, “The world doesn’t revolve around you Rachel!” Adah and Leah are the twins in the Price clan, who are different as night and day. One thing I like about the depictions of these characters is that the author made them strong individuals, which was not typical of women and girls in the 1950’s. The twins were prodigies in math and science, while Leah was normal, Adah was hemiplegic. Many people thought that she was unintelligent because she never spoke, but she quickly became my favorite character because of her thoughts and observations. Closing out the Price clan is the baby, Ruth May. The word I’d use to describe her is poignant. I’m going to leave it that because I don’t want to give too much away. The author did a great job of describing the patriarch of the family, Nathan Price. When I pictured him, I thought of John Lithgow in Footloose. He seemed like a man who would ban dancing in town because it was sinful in his eyes. He’s a character that you will love to hate, believe me. Even though my views, on missionaries will not change, I recommend this book.

That’s all for now! We’ll be back for a review of Drowning Ruth in July!

Friday, June 18, 2010

Dining with Dad (I Heart Cooking Clubs)

Months ago, I planned a special post in honor of my Dad for Father’s Day. It involved a little retrospective about my dad when he was younger, and some special sandwiches he used to eat. But that post ended up being a horrifying culinary experience that I simply could not associate with the wonderful part of my life that is my Dad.

And so, when I saw that this week’s theme for I Heart Cooking Clubs, very appropriately, was Dining with Dad, it really struck a chord. My first instinct was, “what would I cook for my Dad?” but that thought was quickly eradicated by another.

One of my fondest memories of my Dad involves breakfast. Over countless weekends when my sister and I were growing up, Dad would make breakfast. Almost always pancakes or waffles, but sometimes a fried egg sandwich. To this day, I don’t know if he and Mom had some kind of agreement that since she cooked throughout the week, that was his turn to cook; whether he looked forward to spending this time with his family, or if my sister and I just drove him to distraction by whining for pancakes until we got our way.

I can still picture those mornings very clearly. Dad in his robe and us in our nightgowns. The same skillet and spatula, and the same plastic batter bowl and whisk. I can close my eyes and see him whisking up the batter, holding the bowl at an angle. Then using a butter knife to drop a little bit of oleo in the pan, spreading it across the whole surface with the spatula. And he only buttered the pan between every other batch of pancakes. Dad had pancakes down to a science. Knew exactly how much batter to pour into the pan and how long to let them cook before flipping them.

I have a lot of great memories of my Dad, but when I think of food and my Dad at the same time, this is what I remember.

In any case, this tradition stuck with me my whole life, though college and beyond, to the point that when I came home for a visit, I would request waffles. (Dad’s waffles were always my favorite) Then, when I had my son, and he finally reached the age where we could sit down and have a hot breakfast together, waffles were the first thing I made for him.

On that note (that of becoming a parent in my own right) even though my preference would be to have waffles (love those little crevices filled with butter and syrup), I can’t help but think of my Little Man. He does love patty-cakes (that’s ‘pancakes’ to those of you who can’t translate my 5 year-old’s vocabulary), and even more so if there are chocolate chips on them.

So, making this a three-generation breakfast, we are dining with Dad, and Grandpa, depending on which one of us you ask. If it were my Dad cooking, it would be a strict Bisquick mix, but since we are having breakfast a la Mark Bittman, I have used a recipe from his How To Cook Everything that was a real winner for me and my Little Man. Not to mention that he was very excited to be getting chocolate chip pattycakes for supper! I wasn't complaining, either. Sometimes its fun to have breakfast for supper. (Do you think its okay to have red wine with pancakes? Yeah, so do I...)

Here’s to you, Dad. Wish we could have had you here to enjoy them with us. I only hope Ty will have as many great memories of me as I will always have of you. We love you so much and we can't wait to see you in JulyChocolate Chip Pancakes
2 cups flour
1 ½ cups milk
2 eggs
2 tsp baking powder
1 TB sugar
¼ tsp salt
2 TB oil or belted butter

Warm butter in a skillet over medium heat. Mix all ingredients together (can still be a little lumpy) and pour batter into the pan.Sprinkle chocolate chips over each pancake.When the edges of the pancakes begin to bubble, flip them over. Cook until done and serve to one very happy little boy. (Okay, so I added that part on my own.)Here's to you, Dad.

Thursday, June 17, 2010

Bacon Cookies with Maple Icing - Guest Post and a Giveaway Reminder!

Happy July 17th! We are officially ten days into my blogaversary giveaway, and in honor of the occasion, my good friend Ginny has sent me a guest post as a blogaversary gift! Isn’t she sweet?

Speaking of sweet, check out what she made for me to share with you..... Bacon Cookies with Maple Icing.

Yep, the cooking school where she and I occasionally take classes also has a “cookie club” of sorts and this recipe popped up on my Twitter page last week. Cookies...good. Bacon.....GOOD. Maple.......GOOOOOOD. After recently making chocolate covered bacon

for a friend’s birthday, this was definitely on my “must try” list. I’ve been dying to make these cookies, but since Ginny beat me to it, I’m going to let her tell you about them. But, not before I remind you about my giveaway!

My two year blogaversary giveaway will run through July 8th. Each comment you make on new posts between now and then earns you one entry into the drawing. And just FYI, I think David wants to win. He has never once posted on my blog even though he’s been following it for quite some time, and suddenly he is commenting on about every post. Competition, folks! May the best blogger win! Oh, and here’s a new hint for you...CAN you smell what I am cooking??? (ok, it’s a bad play on “The Rock” but hey, what can I say?)

Now, on to the cookies...here is the post I received from Ginny. Enjoy!

Okay, so I'm intrigued by Bacon. The current movement of using bacon in everything borders on insane. (Bacon salt, Bacon Mayo, Bacon Vodka...) There are just some things that ruin Bacon. That being said, I decided to try these, because as I said, I'm intrigued.
First, there isn't a lot of sugar in these. When I made the dough, it made me think of shortbread. Very dry, mostly fat and flour. Second, it seemed fairly straight-forward. I used a pastry cutter to mix the ingredients together and it worked very well. There wasn't much need to knead, Ha! I just had to form it into the log shape. The most complicated part of the recipe was getting the fine chop on the bacon, in retrospect I should have just given it a whirl in the food processor. I had bacon bits flying everywhere. I'm sure that the cat will find them...
The final results, I liked them. I used a double smoked variety of bacon and it almost seemed that the maple syrup overwhelmed the cookie. You almost wouldn't know the bacon was there. I found that I liked the cookie better with less frosting, and that is not typical for me. As much as I like bacon, I like frosting too, so it was a little surprising to me. Without the frosting they were like a lightly sweet bacon shortbread biscuit.
At this point Beth is saying DUH! because she recalls me telling her that I am not that fond of maple flavored pork products and that I prefer that the maple syrup from my pancakes not touch my sausage or bacon. (Yep, its true, that is one thing Ginny and I disagree on. I love to dip my breakfast meat in my maple syrup, but the very idea of it grosses Ginny out, which is why I was a tad surprised when she decided to make these cookies) If you enjoy that sort of thing, these may be right up your alley.

Bacon Cookies with Maple Icing
4 slices thick cut, lean bacon, finely chopped
2 cups all-purpose flour
1/4 cup sugar
8 tablespoons (1 stick) butter, cut into pieces and softened
1 large egg
3 tablespoons heavy cream

Fry the bacon over medium heat until crisp and then drain on paper towels. In a mixing bowl, combine the flour, butter, egg, and cream and mix until well-blended. Add the bacon and knead until the dough is soft and the bacon is evenly distributed, about 1 minute. Roll the dough into one or two logs about 1 1/2 inches thick. Wrap in plastic wrap and chill until firm, at least 2 hours. Preheat the oven to 350 degrees Fahrenheit.
Cut the dough into 1/4-inch thick slices and arrange the slices about 1 inch apart on a lightly greased cookie sheet (use a bit of the bacon grease or use a silicone mat).Bake until the cookies are firm and very lightly browned (they won’t get golden brown), about 12-15 minutes.Transfer the cookies to a rack to cool.Then, spread with maple icing and top with a small piece of candied bacon (recipes below).Maple Icing
Mix a 1/2 cup of powdered sugar with about 3 tablespoons of Grade B real maple syrup (add a bit more sugar, then a bit more syrup until the consistency is spreadable). Ice the cookies when they are cool.

Candied Bacon, aka Pig Candy (optional)
Lay several slices of maple bacon on a silicone-lined sheet pan. Coat each bacon slice with light brown sugar. Bake at 350 degrees until the bacon is crisp, about 25 minutes. The bacon will turn a deep mahogany color; don’t be alarmed. When it’s crisp, let it cool on the rack. Then, cut it into small pieces to put on top of the iced cookies.

~ginny

Here's a quick update from Ginny after she took the cookies in to her guinea pigs, I mean - CO-WORKERS!

Took these to work and yes, people gave me the funny look when I said bacon cookies. That being said, I didn't have one person say they didn't like them. Most thought they were really good, the mildest reaction I got was "Interesting". Not one yuck in the bunch. :-) Most said they wouldn't have known there was bacon in them if I hadn't told them. I even tested it and gave some to people without telling them and they couldn't pick out the secret ingredient. Next time... more bacon, less frosting!

Ok, folks, on that note, I’m off to go fry some bacon! Be on the lookout for another VERY bacon-related post sometime early next week. I have a very pork-fat-friendly surprise in store for the hubs for Fathers Day!

Wednesday, June 16, 2010

I’ll be a Monkey’s Uncle!

It occurs to me that I have been so preoccupied with the multitudes of other things going on in my life that I haven’t even mentioned my son’s extracurricular activities in quite some time. (Yes, I know, its mainly a food blog, but he’s my little guy, he’s adorable, and, dammit, you’re gonna hear about him!)

Well, back around the first of the year, he started attending a new preschool (because his previous school was forced to close) and at the new school, they offer the opportunity for the kids to attend a tumbling or dance class with a visiting instructor once a week. (Yes, it costs more, yes I feel we were railroaded into doing it, and yes, I’m a tad bitter about it.)

But anyhooooo......Ty really enjoyed it. He’s not the most coordinated child (that’s a really nice way of putting it) so I figured it would probably do him some good. Well, naturally, there is a recital involved....even though we started attending well after the supposed “deadline” for costumes for the recital..... But I digress....

Long story short, and much bitterness under the bridge, we finally got through the stage practice, the dress rehearsal, and two recitals with a minimum (okay, maybe THAT’S an understatement) of pain and discomfort. Ty, naturally, had a blast. Mom, naturally, is very glad to say we will NOT be signing up for the next session of classes. *big sigh of relief*

Ty’s group of little tumbling boys “performed” a routine to the tune of “Monkey’s Uncle”. Really, I can’t remember where this song comes from, and it really doesn’t matter. All that matters is that its over now and my son is incredibly cute.

Also, I among other things, I have learned that taking pictures at a tumbling recital generally results in a large quantity of very blurry photos.

So, there you go, folks, cuteness at its best....and don’t even get me started on the “costumes”. (yes, that is a monkey’s face, SHARPIED on the shirt. Nice.)Ty and his former "girlfriend" posing before the show....Oooooo....an action shot! And that's about as lively as my big lug gets. Its not easy to get his feet over that big ol' head of his...And, finally, a group shot of ALL the Monkey's Uncle boys, strutting their stuff. Handsome little devils, aren't they?

A Man Sized Meal

One thing I do look forward to about summer, is being able to try out new recipes, and have some experimental fun in the kitchen (get your mind outta the gutter!). The reason for this is that the hubs is generally laid off during the summer months, which means I don’t have to consistently have a meal on the table every night that I can be certain he will not only eat once, but twice, since he always takes leftovers to work for lunch the next day. This gives me a chance to try new things, and hopefully, add a few recipes to my repertoire to draw from during the winter months. It also means I can put out some dishes that maybe have longer cooking or prep times because I’m not so under-the-gun each night to get dinner and bath time finished by a specific time each evening.

That being said, when the hubs was lounging his unemployed butt around the house last week, watching Ramsey’s Kitchen Nightmares and the Food Network. He fell in love. I received this random text while I was at work:

tyler florence ultimate ribeye and potatoes”

Translation (ok, in MY mind, anyway):

“My darling wife, I realize that you are hard at work, and I truly value your dedication to your job, but I was wondering if you could possibly take a moment to look for the recipe for Tyler Florence’s Pan Roasted Cowboy Ribeye with Creamed Swiss Chard, as well as his Caramelized Onion and Potato Tart, as I just saw him prepare these dishes and I just have a feeling that they would be even more wonderful if you were to prepare them for us next week.”

Yeah, I’m sure that’s what he meant. Anyway, it took me a little while to determine exactly which recipes he meant, but I located them and printed them off. Then, much to my surprise, and his delight, my favorite local grocer had exactly two gorgeous, thick cut, bone in rib steaks when I was picking up our weekly groceries on Sunday.

Lucky Man.

I will include the recipe in its entirety below, but I must warn you that this may involve using every dish in your kitchen (shame on you, Tyler! That’s a bad habit you have!), and unless your cast iron skillet is ENORMOUS, you’ll probably have to use one pan for each steak you are making, as I did.

Knowing what lay ahead of me, I also conjured a lovely cocktail for myself to get me through.

It couldn’t have worked out better, timing-wise, as the hubs called on his way home yesterday (because he was going to be late – I informed him that he was to be home to help me with this meal no later than 6pm) apologizing for being late, at which time I learned that his brand spankin’ new fishing boat was suffering from mechanical problems. He and MG were taking it to the marine shop when the boat trailer blew a tire, leaving them both in a fairly foul mood. However, when said husband popped his head in the front door and smelled the caramelized onions, the mood began to evaporate.

Sniffing his way across the dining room and into the kitchen, he even cracked a smile when he saw the side of beef laying seasoned on my cutting board, and the fresh herbs sizzling away in the skillet.

Comfortable in his Big Beast recliner a short time later, said slab of beef perched precariously on his swimming trunk-clad lap, he says to me, “You’re so good to me.” To which I replied, “No, I’m TOO good to you.” Moments later, he was making noises that I wouldn’t expect to hear outside the bedroom, and was loosening the ties on his swim trunks. And not in the way you might be thinking. He was making room for more steak. HIS thick cut ribeye weighed in at over 20 ounces, and he was determined to eat every bit of it.

He failed.

Between the potatoes and the steak (there is no chard at the market yet, so we skipped that part of the recipe. We did NOT skip the breadcrumb topping, though, and it’s a good thing, because that really pushed the dish over the top), he had to call it quits and allow me to save the rest for another day’s lunch. Probably today. Because I warned him severely that if that meal was still in the fridge come trash day, I was NOT going to be a happy woman.

After which, he proceeded to fall directly into a food coma and I had to wake him to get him to go to bed.

All in all, a very successful meal that I will make again....perhaps not on a week night next time, but still...

Pan Roasted Cowboy Ribeye with Creamed Swiss Chard
2 large (16 to 18-ounce) bone-in rib-eye steaks
1 sprigs fresh rosemary
4 sprigs fresh thyme
Extra-virgin olive oil
Kosher salt and freshly cracked black pepper
Bread crumb topping:
1 tablespoon extra-virgin olive oil
1 tablespoon butter
2 to 3 garlic cloves, thinly sliced
2 sprigs fresh thyme, leaves removed
2 sprig fresh rosemary, leaves removed
About 1 cup panko bread crumbs
Salt and freshly cracked black pepper

Creamed rainbow chard
1 large bunch Swiss chard, leafs removed from the stem and leaves chopped
2 cups heavy cream
2 fresh bay leaves
2 sprigs fresh rosemary
4 sprigs fresh thyme
2 to 3 cloves garlic, peeled
Freshly grated Parmesan, to taste
Salt and freshly cracked black pepper
1 lemon, juiced

Directions
Preheat oven to 350 degrees F.
Take a cast iron pan and set over medium-high heat. Add a 2-count of olive oil and add rosemary and thyme. The herbs will begin to crackle as the oil heats up and the oil will be infused with the flavor.Remove the herbs from the pan and place onto a paper towel lined plate. Season the rib eyes well with salt and pepper and add to pan and brown for approximately 4 minutes.Turn the rib eye over and place the whole pan into the preheated oven, on the bottom shelf, for another 12 minutes for medium-rare. Add another 2 minutes for medium.

Place a saute pan over medium-high heat and add 1 tablespoon extra-virgin olive oil and butter. Once the butter has melted, add the garlic, thyme and rosemary leaves, and the panko and stir to combine. Once the bread crumbs are toasted, season with salt and pepper.

Place a saucepan of cream with bay leaves, rosemary, thyme and garlic over medium heat and simmer until reduced and thick. Blanch leaves in some salted boiling water until wilted. Remove the Swiss chard from the water and allow it to drain in a strainer. Push any excess water out of the Swiss chard using some paper towels. Set aside to dry at room temperature.

When ready, remove herbs and garlic from cream and fold in the Swiss chard. Add Parmesan, to taste, and season with salt and pepper to taste.

Once steaks are done, remove from the oven and allow to rest for 5 minutes. Serve on a plate and top steak with creamed Swiss chard. Garnish with the toasted bread crumbs, lemon juice, and season with salt. Caramelized Onion Potato Tart
1 large onion, sliced
Extra-virgin olive oil
Kosher salt and freshly ground black pepper
4 large Russet potatoes, washed
2 to 3 tablespoons butter, broken into small pieces
Special equipment: parchment paper cut into large circle to fit saute pan

Preheat oven to 350 degrees F.
Set a large skillet over medium heat and add 4 tablespoons of olive oil. Add sliced onions and cook over medium heat for 10 to 12 minutes until they are tender and brown all over.

Using a mandolin (or sharp knife), finely slice the potatoes into rounds (you can place them in a bowl with a wet towel over the top to stop them from going brown while you work). Place the potatoes into a bowl and season with salt and pepper. When ready, add the onions and toss to combine without breaking potatoes.

Add about 1 tablespoon water to the same pan the onions were cooked in and allow it to come to a bubble. Using layered paper towels, wipe the pan clean.

Add some extra-virgin olive oil to the pan and add the potatoes to the pan, making sure the potatoes are flat. Top with the diced butter.

Take a piece of parchment paper and fold in half. Find the middle of the parchment along the crease and hold in place with your finger. Taking the right side of the parchment, pull it towards the center and fold it straight down to create a diagonal edge. Fold the parchment in half to create a triangle. Place the pointed edge in the middle of the saute pan on top of the potatoes to find its radius. Make a marker of where the pan edge ends (or starts). At this point you can cut the parchment at this marker and open to reveal a circle.

Cover the potatoes with the parchment paper and press down. Drizzle some extra-virgin olive oil over the top so it down burn and rub it in.

Place the pan into the oven on the top rack and bake for about 45 minutes.

When done remove from oven and run a knife around the edge to separate from the pan. Place a large plate on top of the saute pan and flip. Remove the saute pan. Allow to cool slightly before cutting into slices.

I Rolled a Fatty – and I’m Gonna SMOKE it!

Ok, a few people out there are thinking, “WHAT? Why would she do THAT???” Here’s a little inside secret for you....

I’m talking about pork.

Yep, you all know my husband’s proclivities toward meat, meat, and more meat. Well, I decided that for Fathers Day this year, I’d make him a special treat. Something I’ve been seeing all over the internet and thinking to myself, “Boy, my man would really enjoy that.” That’s right, you know it, I’m talking about the Bacon Explosion.

This novelty has been all over the news this last year and it is basically a heart attack rolled up in bacon. You can check out the BBQ Addicts blog (the creators of the Bacon Explosion) for more details about this “fatty” as they call it, how it is made, and where you can order one, if you’re not as inclined as I am to experiment.

It starts like this:
You make a woven square of bacon slices.
You generously sprinkle it with your favorite BBQ seasoning.
Then you layer a couple of pounds of Italian sausage on top of the bacon weave.
Add crumbled up, cooked bacon pieces, more BBQ seasoning, and then douse it with a good barbeque sauce.
I also chose to add jalapeƱos to mine, since we do like the heat.
Then, picking up just the sausage layer, you roll it all up into a sausage fatty.
Place the fatty in the middle of your bacon weave and roll the bacon up around it.
Voila! One pork fatty. Just begging to be smoked.
Sprinkle it with some more BBQ seasoning, and put it on the grill to smoke for a couple of hours, then glaze with more barbeque sauce at the end.
Slice and serve, either on its own or as a sandwich, or just hook it up to an IV and prepare for pork euphoria.

Well, I rolled my fatty last night, in preparation for Fathers Day. Its sitting in the fridge, just waiting for its 15 minutes of fame. Get ready for pictures and more on Monday.....

Tuesday, June 15, 2010

Fresh Cherry Margaritas

Occasionally, I find myself with a variety of ingredients or other food items that I need to find a use for. Generally, this happens in the middle or late summer, when I’ve had about all I can stand of tomatoes or other garden produce. But right now, I have an odd combination of ingredients on hand that beg to be utilized.

The first being fresh cherries. When they first come in season, I can’t get enough of them and I gorge myself stupid. That was last week. I still had about a pound of cherries on my kitchen counter threatening to go bad.

The second being agave nectar, left over from the tequila lime bars I made for a co-worker’s birthday yesterday.

Lastly, a bottle of tequila, also leftover from the birthday food, but as I stated in that post, me and Jose went our separate ways in college and haven’t spoken to each other since. So, I was eagerly looking for food-related recipes to help me use this bottle up.

Then, I went through my blog reader yesterday afternoon. And Evil Chef Mom gave me inspiration. And, admittedly, a little bit of drool. See, I had promised the hubs a very labor intensive meal (a la Tyler Florence) that he had discovered on the Food Network last week and it was on the calendar for Monday night. I was going to need a drink....extra bonus? I get to use up some of my forlorn ingredients.

People, I give you....the Fresh Cherry Margarita.Yessir....she’s beautiful. I even happen to have a cocktail shaker I bought years ago and have NEVER. ONCE. USED.

Well, that’s all changed now. I sipped this tasty little concoction last night while cooking a ginormous ribeye for the hubs and it made me so much more mellow about the procedure.
Oh, yeah, and I don’t have to worry about finding any more recipes to use up the tequila....as long as I have cherries, that’s not going to be a problem. AT. ALL.

Fresh Cherry Margaritas

adapted from fine cooking june/july 2010
serves 1

12 fresh sweet cherries, pitted
1 1/2 fl. ounce silver (blanco) tequila
1 fl. ounce fresh lime juice
1/4 fl. ounce Chambord (I didn’t have the Chambord, and I wasn’t about to buy an expensive bottle just for this. I think it would really have take it over the edge, but we’ll save that for next time, now that I know how good they are.)
3/4 fl. ounce agave nectar
1 fresh cherry with stem for garnish
1 wedge of lime, for garnish

Put the cherries in a cocktail shaker and mash them with a muddler or the end of a wooden spoon until well crushed, about 1 minute.
Add the tequila, lime juice, agave nectar, Chambord, and eight large ice cubes. Cover the shaker and shake vigorously for 30 seconds.
Immediately strain into a glass filled with fresh ice. Garnish with the cherry and lime wedge.

This cocktail will definitely be seeing a repeat performance in my kitchen - SOON!

Margaritaville – Tequila Lime Bars

If you’ve been around this blog for very long, you have probably noticed that my office is very food-centric. We will use any reasonable excuse (and some that are just completely unreasonable) to bring food in to work. The ironic part is that it used to be much, much worse. When people talk about putting on the “freshman 15” when they went to college, I just smile. Working here is very much like that, only its more like ‘25’ since we all sit at desks all day, letting the calories seep into our chair-butts.

So, it was no surprise when we got an email last week, announcing that my boss’ wife was turning 40 and we were going to have a birthday food table for her on Monday. What this means is that we are all invited to bring in a dish of our choosing, and then spend the day grazing on a veritable buffet of fat and cholesterol for the rest of the day. In this particular case, the birthday girl is a big fan of the “Margaritaville” genre, and so we had a birthday table with a theme.

Oh, darn, twist my arm....I’ve been dying to try this recipe anyway and anything with the word “tequila” in it definitely fits the theme.

I did have a little difficulty buying the tequila, which almost put a damper on the whole thing though, since, you know, me and Jose? Yeah, we’re not such good friends.... Well, that, and the fact that none of the stores in town had a small bottle of tequila. And I didn’t really want to drop a twenty dollar bill on a bottle of liquor that I won’t even drink (okay, hello....that’s an official call out for food recipes involving tequila! Help a girl out! I need to find a way to use the rest of this tequila that doesn't involve a hangover...). Fortunately, I did finally find a $13 bottle of Cuervo at the local Walmart (too bad I wasn’t thinking about this when I was at the liquor mega store in Springfield on Saturday!) and proceeded to crack open the bottle, carefully holding it out of smelling distance. *shudder*

I did have a moment of dismay with this recipe, as I was reading the ingredient list, and Ginny and I had a phone debate over how many egg whites it actually required. This is how the original ingredient list reads:
"5 large egg yolks, plus 2 egg whites"

My opinion was that I should use the whites from the 5 eggs that you used the yolks from, PLUS two additional whites.

Ginny’s take was to ONLY use 2 whites and no more.

I ended up compromising and started with two. When that looked like it would in no possible way do the trick, I added the rest of the original five to the bowl, and I think it turned out just fine. And so, I have amended the recipe accordingly.

These little beauties were quite tasty! The lime flavor is quite intense, and there is definitely a tequila undertone there as well, but I was still able to muddle through my little piece. Drizzling a little agave nectar on it really pushed it over the top, countering the tartness of the lime with the sweetness of the agave.

My only complaint about this dish was the large number of dirty dishes I ended up with for one 9x13 dessert. Other than that, it was very easy to put together and quite tasty!
Tequila Lime Bars
1 12-ounce box vanilla wafers
1/2 cup pine nuts
3/4 cup unsalted butter (11/2 sticks), melted
1/3 cup tequila
1/2 cup fresh lime juice (about 4 good sized limes, in my case)
5 large egg yolks and whites, divided
1 14-ounce can sweetened condensed milk
1 tablespoon sugar
Agave nectar for drizzling
zest of 2 limes

Preheat the oven to 350. Pulse the wafers and pine nuts in a food processor until well ground up. Add the melted butter and blend until evenly mixed. Set aside 1/3 cup of crumbs; press the rest evenly into a 9-by-13 baking pan. Bake until golden brown, 15 to 18 minutes. Cool.
In a medium bowl, thoroughly whisk together the tequila, lime juice, egg yolks, lime zest and condensed milk.
In another medium bowl, beat the egg whites and sugar with an electric mixer until they hold soft peaks. Gently fold the egg whites into the tequila mixture. Spread the filling evenly over the crust and bake for 25 minutes; cool. Sprinkle the reserved crumbs on top. Chill in the fridge for 2 hours or overnight before cutting. Drizzle with agave nectar, if desired.

Monday, June 14, 2010

The Ten Spot

Okay, I admit freely that I am totally robbing this idea from a fellow blogger. Pam over at Sidewalk Shoes has been sharing a regular series on wine called “Weekend Wine Reviews”, and I love it! Since I have some friends who are starting to get interested in wine and regularly ask my opinion on their choices, I’ve decided to start sharing what I have found here as well.

One very important thing you should know about me as a wine drinker is this. I’m cheap. I would be hard pressed to pay more than ten dollars for a bottle of wine, and if I can find one for half that price that I enjoy, well, even better.

Hence the name of this post, The Ten Spot, as I will be trying out new wines that are ten dollars or less per bottle and reviewing them here. The good, the bad, and yes, also the nasty.

I am by no means claiming to be an expert in all things wine, I just know what I like and I don’t think you should have to spend a fortune on a bottle to be able to enjoy wine.

I don’t have a set schedule for this post, you will just see it appear randomly, whenever I find something I think is worthy of sharing.

Like today!

Jam Jar Sweet Shiraz $9.99I’ve been wanting to try this one since it came out as a special in my local liquor store newsletter a few weeks ago. One of my book club friends has a preference for sweet wines and since I prefer dry, we don’t usually enjoy the same wines. The description of this wine intrigued me since a Shiraz is not a sweet wine, but this one was described as “like drinking a jar of jam”.

And the man at the store who told me that (must be popular because he walked right up to the bottle on the shelf when I asked for it) was absolutely right. The first glass was like drinking boozy, liquefied blackberry jam. Sweet, and almost viscous on the tongue. The second glass brought out more of the dryness of the shiraz that I am familiar with. It was a very intense wine, and for the heat of summer, I can see it being very tasty as a spritzer. I’ll be getting another bottle for our next book club meeting.

Be on the lookout for more editions of The Ten Spot as I explore new wines in my small town!

Thursday, June 10, 2010

Mixing it Up - Bittman Style!

Even as much as I adore grilling in the summer, I still manage to get in a rut for ideas on what to make. I mean, really, how many different ways can you grill a chicken breast, right? I do love the larger cuts like brisket and ribs, and so forth, but those time-consuming items are reserved for Sundays when time is generally not a concern.

So, when I was making my grocery list last week, as usual, I asked the hubs if he had any suggestions. And, as usual, I got bupkus for a response. So, I fell into my usual routine of browsing the local grocer’s meat case, appealing to it to produce something new and attractive. On this occasion, I did actually find a small bit of inspiration. Nothing dramatic, but for some reason there was a glut of various sausages available during my weekly visit.

I grabbed up a package of Garlic Italian, one of Andouille, and a third of a local Bockwurst. Can you say “mixed grill”? I knew you could. I froze half of it for another day, and we grilled the three sausages, plus some sweet corn and farmers market asparagus for a nice, easy weeknight meal.
Pretty, no?

So here’s the twist. I was searching for a dish to make for I Heart Cooking Clubs this week (this being our monthly ‘Pot Luck’ theme) and was inspired yet again when I ran across Mark Bittman’s recipe for Asparagus Pesto.

Asparagus. Pesto. Yum! I love pesto. I love asparagus. I never would have dreamed to put the two together even though I have made a number of variations on pesto in the past.

Bittman’s recipe calls for boiling a pound of asparagus until tender but not mushy. Well, I had used up all my nice asparagus on the grill (and, in a skillet, when the propane bottle ran out halfway through the cooking process) the night before (and anyway, I’m not a fan of boiling vegetables) so I ran to the Wednesday night farmer’s market hoping to purchase another bundle.

Um, no. Its gone. Apparently the season is really over. So sad. But, undeterred, I had a brainstorm. I had the leftover asparagus in the fridge....and I had made quite a bit of it, so there was plenty for a half batch of Bittman’s pesto. Which is more than enough for me for dinner.

Excited, I ran home (ok, yes, I drove) got the food processor out (lucky me, it was still out from being used for something yet to be posted, and had been washed) and started chucking ingredients in the bowl.

Pestos are so easy, people. Really. I mean, its an herb or vegetable, oil, nuts, cheese, and maybe some acid. No recipe required (although I will post Bittman’s below, just for reference) just keep adding until it looks right.

Start with something green, in this case, about a half pound of leftover grilled/sautƩed asparagus.
Toss in a handful of pine nuts (or almonds, hazelnuts, etc. Preferably toasted, but I was lazy last night and just tossed them right in).
Add a handful of grated parmesan.
(Normally I add garlic, but I was afraid in this case it would overwhelm the flavor of the asparagus, so I skipped it.)
Salt and pepper.
A good squeeze of lemon juice (about a half a lemon).
Put the top on the mixer, press ‘ON’, and drizzle olive oil through the top until the mixture forms a nice smooth paste.
My one tip is start small on the other ingredients, as you want your asparagus to be the center of attention. If you add too much cheese, and you are out of asparagus, you’re also out of luck, so add a little at a time if you’re a novice pesto maker.

And....PESTO!Lovely, lovely....now. What to do with it? I thought smearing it on crusty bread would be nice...if I had some. Which I didn’t. Crackers? Yeah, the saltines in my pantry weren’t exactly worthy of such a topping. A layer on a nice Panini with mozzarella and ham would be delish. I had the ham and cheese...again, no bread.

PASTA! I am usually hesitant to make a pesto pasta because it seems like the pesto just disappears on the noodles and becomes too subtle. This asparagus pesto was springy and pungent and I didn’t want to give up the lovely chunkiness of it. So what do I do? Make orzo.

Yep, I boiled up about a cup of orzo, and just mixed enough of it into the pesto to get the consistency I wanted, and VOILA! Fabulous. A lovely summertime dinner I couldn’t wait to dig my spoon into. This turned out so creamy and luscious, it wasn’t much different than a risotto in texture.The whole thing went together in about 15 minutes since I used leftover asparagus and I scarfed it down just as fast.

Thanks again, Mark Bittman, for a fabulous idea! I usually only cook as much asparagus as I intend to eat for that meal, but I’ll be grilling extra from now on, just so I can make pesto with the leftovers! This is my submission for I Heart Cooking Clubs and Presto Pasta Nights (check for the roundup later this week at http://www.kirstenlindquist.blogspot.com/) this week!

Now, here’s the original recipe:
Asparagus Pesto
Kosher salt
1 pound asparagus, trimmed and cut into 2-inch segments
4 cloves garlic
1/2 cup toasted hazelnuts
1/4 cup olive oil, or more as desired
3/4 cup freshly grated Parmesan cheese
Freshly ground black pepper
Juice of 1/2 lemon, or to taste.

Bring a large pot of salted water to a boil. Add the asparagus and cook until tender but not mushy, 8 to 10 minutes. Drain well and shock with ice water to stop the cooking. Reserve some of the cooking liquid.
Transfer the cooled asparagus pieces to a food processor and add the garlic, hazelnuts, 2 tablespoons of the oil, Parmesan, a pinch of salt and a couple of tablespoons of the cooking liquid.
Process the mixture, stopping to scrape down the sides of the container if necessary, and gradually add the remaining oil and a bit more of the reserved cooking liquid to moisten if necessary. Add the lemon juice and season with salt and pepper to taste, pulse one last time to finish mixing.
Serve over pasta, fish or chicken. Top with chopped hazelnuts and additional Parmesan cheese, if desired.
Makes about 1 1/2 cups of pesto. Keeps, covered and refrigerated for a day or two.

Tuesday, June 8, 2010

Oreo Truffles

Every once in awhile, the hubs actually comes home with a request for a specific food item. Since it is so rare to get this kind of input, I always do my best to make it happen. In this case, he was working a job in Granite City and he got to know one of the plant personnel pretty well. She is very interested in cooking and all things “food” and told him about a request she had from a family member to make Oreo Truffles for an upcoming wedding.

Now keep in mind that my husband really doesn’t have a sweet tooth. Generally, if he asks me to make something sweet for him, it is so he can take it to work to share, but he rarely eats any of it himself. In these cases, I try to put him off because I don’t enjoy putting time into making something that I know he’s not going to eat. So, when he kept bringing up the topic of the Oreo Truffles, I finally had to break down and make them.

It was a very simple recipe, with three ingredients. Yep, that’s right. THREE.

Here you go....

In a food processor, combine one (standard size) package of Oreos and one (8 ounce) brick of cream cheese, and pulse until the cookies have been reduced to crumbs and are well blended with the cream cheese.

Scoop the mixture into balls (I used my smallest cookie scoop) and roll between your hands for a more uniform shape. If they are too soft to handle, place the balls on a parchment lined cookie sheet and pop them in the freezer until they can be handled without making you look like the perpetrator of an Oreo massacre.Once the balls are all shaped, melt about 16 ounces of semi-sweet chocolate and dip the balls in the chocolate to coat. Top with something pretty (I used white sugar crystals but you could use cookie crumbs, sprinkles, sanding sugar or nothing at all, if you’re a purist), and then put the sheet back in the fridge or freezer until the chocolate sets.Then, place the tray in front of your husband and anyone else in the vicinity, stand back and watch the carnage.

I pulled these out last night while the hubs’ buddy MG was visiting and we were all hanging out on the deck. (MG was the best man at our wedding and one of our son’s favorite “uncles”) MG has a firm rule about eating. Once he has a beer in his hand, no more food is going to pass his lips until he is done drinking. Well, he broke that rule last night.

Have you ever had one of those moments where someone tastes food that you have made, and you are watching them. You see an expression come over their face that makes you wonder if something has gone horribly wrong....did you accidentally use salt instead of sugar......how old were the eggs that you used.....do beer and chocolate turn to acid when combined in a man’s mouth.....

And then, he points at you, nodding gently and licking his fingers, and through a chocolate mustache says, “You’re an evil woman.....”

Yes, that’s when you know you have achieved nirvana. Its easy enough to please someone with chocolate. But take a carnivore who is not a huge fan of sweets, and definitely doesn’t like to eat when he is drinking....and bring him to his knees with one bite. Yeah, I call that success. And yes, he took a container home with him.

Now, my co-workers are blessed with what I could salvage from the fray last night, and we’ll see what they think. But come on...its chocolate...and Oreos....really, its kind of a no-brainer.....

Ready, Set.....GO!

It's June 8!

That means today is the start of my Fabulous Blogaversary Giveaway!

I'll be giving hints all month long as to what will be included in the prize, so stay tuned.

HINT #1: This food related prize will be directly related to foodie activities in the mid-summer, since that is when my blogaversary is.

More importantly, COMMENT! Every comment you add to my new blog posts between today (yes, that includes this very post) through the end of the day July 8 will get you one entry in the drawing. (detailed "rules" can be found here)

Now, no cheating, I will not count blank or intentionally lame comments! Make me believe you actually read the post you are commenting on!

Good luck to all - GAME ON!

Monday, June 7, 2010

License to Wed - UPDATE!

Well folks, it is official. I have joined together two lovely people in holy matrimony. Friday night, I performed my first wedding as an ordained minister, and I am thrilled to say that my first experience presiding over a wedding couldn’t have involved a more charming young couple. Trista and Nathan gave me no doubts whatsoever as to their love for each other and it was truly an honor to be able to be a part of their special day. The moment they finished their vows and it was my turn to say “Husband and Wife”, the look of sheer joy on each of their faces was the most heartwarming thing I’ve witnessed in quite some time.

This morning I trotted myself straight over to the courthouse and filed the papers personally. As soon as the photographer sends me some pictures, I’ll post one for you all to see. In the meantime, I’ll be preparing to preside over my step-niece’s wedding in June.

UPDATE!!! Finally got some pictures from the wedding to share with you. Its hard to get pictures when you're the one at the front of the church instead of at the back!(not the best shot, but here I am leading them in their vows)

Congratulations, Trista and Nathan!(me with the blushing bride after the ceremony)

Thursday, June 3, 2010

I Never Promised You an HERB Garden.... I Heart Cooking Clubs

Can you tell I grew up listening to soft rock on my parents' radio?
I couldn’t have been more pleased with this week’s theme for I Heart Cooking Clubs, and for two reasons.

1. I totally flaked on it last week because I am so crazy busy getting ready for this weekend’s wedding. However, I did have a recipe picked out for last week’s Garlic Breath theme, and it turned out that it fits perfectly into this week’s Herb Garden theme as well! SO, bonus for me!
2. My herb garden is just producing fantastically, so I got to use some of my lovely aromatics.
3. My chosen recipe was a perfect side dish for the grilled stuff pork chops the hubs whipped up the other night.
Yes, that’s right, the hubs cooked. He’s been spending more time at home lately since he’s been laid off and caught an episode of some Bobby Flay trainwreck of a show (sorry, I can’t help it, I think Bobby Flay is the char-broiled spawn of the devil) and thought his grilled stuffed pork chops sounded like good eatin’. WHAT. EV.

Anyway, the chops are basically a pork-cordon-bleu type thing where you take a really thick pork chop and butterfly it, then pound it out flat, then stuff it with ham
and swiss,fold the sucker back up,season and grill.Actually, it didn’t turn out too bad. The heat of the grill was a bit much for the pork and it got a bit dry, but it gave us some inspiration for a different rendition to try at a later date. SO keep an eye out for that one! I also had him throw on some lovely asparagus I picked up at the farmers market this weekend.As for the Herb Garden I never promised you..... how about some Linguine with Garlic and Olive Oil.....and herbs!This recipe has a variation listed that calls for A CUP of chopped fresh herbs of your choice. I promptly attacked my herb garden with a gusto that may have frightened the hubs’ friend who was hanging out with us in the front yard, but hey, no one can say I’m not an enthusiastic cook.

I also happened to have a package of Sweet Red Onion Linguine from Papparedelle’s pasta that I had been looking for an excuse to use. For the dressing, you basically warm up a half cup of olive oil in a pan (while the pasta is cooking) and simmer some garlic until it is soft (Bittman says 2 cloves, I say at least four), then add in your herbs and more olive oil, if necessary.Drain the pasta and toss! Fantastic.....That’s my submission for I Heart Cooking Clubs this week!

Lime Blueberry Tiramisu

Sometimes people surprise me.

I have always enjoyed Paula Deen. Reading her books, watching her shows, even meeting her in person at a book signing. But I have to admit, I don’t make a lot of her recipes. Frankly, they tend to be too fatty for me, and use a lot of prepared food items.

Recently, I was browsing through an email newsletter and came across a recipe entitled Lime Blueberry Tiramisu. Now, normally I am a tiramisu purist, but with blueberries being in season right now, this one caught my attention. Reading the recipe, I was even more intrigued. Although it called for a can of blueberry pie filling instead of fresh, it actually lists mascarpone cheese (instead of the cream cheese most country cooks seem to want to replace it with).

Boy was I surprised to see that it was a recipe from our girl Paula!

I knew I had a birthday food event coming up at work, so I immediately proceeded to conjure up a pound of mascarpone (food of the gods) and gathered the remaining ingredients.

This dish was not only quick and easy to put together, but the limeade concentrate gives it a wonderfully limey flavor punch that I thoroughly enjoyed. It was light and fresh and just perfect for a June day. This one is definitely a keeper!

Lime Blueberry Tiramisu
Recipes courtesy Paula Deen, 2008

Ingredients
1 pint heavy whipping cream
1/4 cup confectioners' sugar
1 pound mascarpone cheese, at room temperature
3 (3-ounce) packages unfilled ladyfingers
1 (6-ounce) can frozen limeade concentrate, thawed
1 (21-ounce) can blueberry pie filling
Fresh mint leaves, optional

Directions
In a large bowl, beat cream with an electric mixer at medium speed until thickened. Gradually add confectioners' sugar, beating until soft peaks form. Gently stir in cheese until combined; set aside.
Split ladyfingers in half. Line a 13 by 9 by 2-inch baking dish with ladyfingers, cut side up. Brush ladyfingers with limeade concentrate. Spoon half of cheese mixture over ladyfingers. Top with half of blueberry pie filling.Repeat procedure for the next layer with remaining ladyfingers, limeade, cheese mixture, and pie filling. Cover and chill 8 hours. Cut into squares to serve. Garnish with fresh mint, if desired.