Friday, July 30, 2010

Blackberry and Red Wine Jam - its canning season!

I did not grow up in a family where canning was a part of our summer. We didn’t live near a farm, and we didn’t have much in the way of a garden. We were city folk.

Well, now I’ve married into the country lifestyle, and I adore the idea of canning. But it scares me.

I’ve canned a few things and then I rarely end up using it because I’m always nervous about random bacteria. That, and I live on a well and the water leaves this nasty white residue on the outside of the jars. I know, I know, its just minerals and it wipes right off, but still. It freaks me out.

But I WANT to be a canner. I really do.

So when I was out browsing for a jam recipe, I ran across Steph Chows blog and learned that there is such a thing as a “Jam Exchange”. That’s right, a bunch of people all over the country make jam and then send it to each other. I am sooooo signing up for THAT!

As you may have heard if you follow me on Twitter, I’ve recently been endowed with large quantities of fresh blackberries, courtesy of the hubs’ buddy, MG. More than twenty quarts. So, I did a lot of freezing, but I still had several quarts in the fridge I needed to do something with, and that means jam.

I had seen recipes for blackberry with port, or strawberries with port, but since port never last long at my house, I didn’t have any on hand and I didn’t want to wait until I could get to a decent liquor store to pick up a bottle.

But you know what else goes really well with berries? Red wine. So, in place of the port, I poured some red wine into a saucepan and reduced it down to the ¼ cup the original recipe called for. I worried about the amount of sugar it called for, but I didn’t want to chance changing the recipe too much so I left it. The jam did end up awfully sweet, but still quite tasty.

Well, I signed up for the jam exchange this morning, and this will be one of the jars I send out! Unless, of course, one of the dozen or so other jam recipes I have filed away turns out better....

Coming up next – Blueberry and Lavender Jam! Stay tuned!
Blackberry and Red Wine Jam
4 cups fresh blackberries (crushed)
1lb sugar
Juice of 1 lemon
1/4 red wine reduction

Simmer about ¾ cup of red wine in a small saucepan until reduced to about ¼ cup.

Add the crushed berries and the sugar to a large, deep pot. Heat on low, stirring often, until the sugar is dissolved.Add the lemon juice and bring the heat up to Med/High, stirring to blend.

Cook until the berry mixture reaches 220F. Carefully add the wine reduction, stir and reheat to 222F. (Note: I could not get my jam to break 220 degrees, so I quit mine a bit early, but it turned out fine. Remove from the heat and let rest for 3-5 minutes so the berries can mix with the syrup. If any obvious hard blackberry cores rise to the top, remove them for a smoother jam.

Note: at this point, I actually put my jam through a food mill to remove all the seeds and hulls. My jam also did not seem to be gelling very well, so after straining off the seeds, I put the mixture back in the pan, brought it up to a boil and added some liquid pectin.Pour hot jam into sterilized jars, seal properly and finish with a hot water bath for 10 minutes. OR, just pour into freezer containers and freeze.

Thursday, July 29, 2010

A Night at the Fair

Just a quick post because I totally forgot to put up any pictures of my boys at the fair! Here are my men (big and little) at the truck and tractor pulls:

And me (rockin' my new FREE Mad Housewife t-shirt - thanks Keenan and Damian!) with the boy, sweating our butts off in the near 100 degree heat.
(yeah, I know, the hubs isn't so good with a camera...blurry, much?)

And one more...Daddy taking Ty for his first ever bumper car ride (and nope, he did NOT enjoy it!).

More to come, we're going to be incomunicado for a few days. I hope to have lots of cool stuff to post when we get back! Have a great weekend, everyone!

Cook The Books - The School of Essential Ingredients by Erica Bauermeister

I must say, I do a lot of reading. And it has been a very long time since a book has grabbed ahold of me and held me captive under its spell the way this book did. From the moment I picked it up, I was captivated. Yes, the book revolves around food, so it almost goes without saying that I would relate to it on some level, but it is more than just a story. This book is the blending of nine individual lives and their own personal stories into one. In this book, there are no secondary characters. No supporting roles. Each person occupies an integral piece of the pie, so to speak.

Our newest selection for Cook the Books is The School of Essential Ingredients, by Erica Bauermeister, a novel about Lillian, a woman who runs her own restaurant and has lived most of her life through her cooking, discovering herself in the struggle to communicate with her mother through food. Lillian holds cooking classes at her restaurant and the book unfolds a story of the lives of her eight students. Each chapter focuses on one of the students, recounting the tale of how they came to be the people they are, what brought them to the restaurant, and how they become intimately involved in each other’s lives.

There were so many parts of the book that spoke to me, I eventually lost track and found myself becoming connected to the characters as well. I found myself laughing with them, cheering at their victories and grieving for them in times of loss. When trying to decide what to cook for this book, I thought I would find the answer by choosing my favorite character, but I couldn’t make myself choose one over another. So instead, I focused on my favorite scene in the book, which wasn’t easy either, and coincidentally, it also had one of my favorite meals as its central theme. Thanksgiving. I absolutely loved Lillian’s take on the traditional Thanksgiving meal, as I find myself every year trying to update the dishes we put on our table. What touched me most about this chapter, however, wasn’t as much the food, as the interaction between Isabelle and Antonia. Antonia is a fantastic Italian woman, striving to find her own place in our world, and Isabelle is a lost soul, desperately trying to cling to the well-worn life she seems to be losing her grip on. In this scene, Isabelle warns Antonia that she “seems to be losing herself lately” and that Antonia is taking her chances cooking with her. In a seamless role reversal, Antonia naturally assumes the role of Isabelle’s caretaker, and gives Isabelle the precious gift of little bits of memories returned to her. Pleasant memories or not, each glimpse is a treasure to Isabelle and we were lucky enough to relive them with her. A sprig of rosemary held under her nose reminds her of her honeymoon, a dish of cranberries soaking in sherry queue the memory of dinner parties past, and a bit of pasta dough brings to life the touch of a long lost lover. Antonia knows innately how to stimulate Isabelle’s mind with her sense of smell and of touch.

Smells and fragrances have always been the glue that holds my past to my present in the form of my memories and this chapter was a special treat for me. Bauermeister’s way of drawing out an image with such sensual descriptions of smell, touch, and taste reeled me in and touched my soul in a way very few books can.
And so, for my post, I chose Isabelle and Antonia’s turkey breast, stuffed with cranberries, garlic and rosemary. And as you know, you can’t have Thanksgiving without side dishes, so I also prepared Lillian’s green beans with lemon and pine nuts (since green bean season is in full swing right now) and polenta with gorgonzola (because, after all, I am a fantastic Italian woman, myself!). And I have to say, while I was bringing the meal together, I made a point to stop and smell each and every ingredient. Instead of Isabelle’s sherry for the cranberries, I opened a bottle of port to soak them in, and was transported back to Brown County, Indiana a few years ago, where I stood tasting wines at a local shoppe with my mom and my sister, and had my first taste of a beautiful local port during a day of mother-daughter quality time.

At the end of the book, I found myself sad that there was no more to read, wanting to know more about what happens with the students and their teacher. Whether the author intended it this way, I will never know, but upon finishing the book, I turned back to the front cover and read the title again. The School of Essential Ingredients. Suddenly I found that the “essential ingredients”, at least for me, did not come from the kitchen pantry, but were the characters themselves. In the end, each student was an essential ingredient in Lillian’s life, making her the person she is.

I hope you enjoy my translation of Lillian’s Thanksgiving. I think the meal was appropriate for the celebration of life, past and present, that Isabelle and Antonia shared in the kitchen that day.The turkey was so flavorful with the herbs and the touch of port infused in the cranberries, and the fresh farmers market green beans were wonderful with the lemon to really make the flavor pop. But the polenta was by far my favorite. Rich and creamy, the gorgonzola was a standout ingredient in this lovely dish. That is one I'll make again and again. I also especially love that the cooking class always had wine with their meals, and so I enjoyed a nice glass of Merlot with mine as well.

This is my submission for Cook the Books. Please check out all the other wonderful creations made this round as well!

Wednesday, July 28, 2010

Trisha Yearwood's Apple Dumplings

Did you know that Trisha Yearwood has a cookbook out? I did. And I know this because I’ve been seeing a lot of bloggers talking about it. But you know what? I really wasn’t excited about it. As a matter of fact, I don’t even know if I can honestly say I read a single post all the way through.

Why? I don’t know. Its not that I don’t like Trisha Yearwood. I do. She has a wonderful voice and she is a great musical talent. I just never thought of her as a cook, apparently, because I have been dismissing her new book without cause. And you know what? That’s not like me. I am a very open minded person, and I am always trying new things, so I don’t know what my problem was.

That is, until my friend Kim posted Trisha’s apple dumplings. Oh MAN, did they look good. I admit, I skulked around the internet until I found the recipe. (Hey, don’t look at me in that tone of face, when you buy a car, you give it a test drive first, right?)

It really doesn’t get much easier than this. And inexpensive, too. I mean, a can of biscuits, two apples and some staples like butter and cinnamon. I whipped these bad boys up Sunday morning and took them with me to the weekly family breakfast at the motherinlaw’s house. You could say they went over well. You know, considering that the average person at the table had 2-3 dumplings and I swear someone almost licked the pan clean. These were TASTY. Health food, this is not, but really, if you think about it, there are a lot of breakfast foods that are worse for you.

Trisha has achieved a new level of respect in my book, and I just might have to put her book on my list. I’ll definitely be making these again.
Apple Dumplings
2 Granny Smith apples
1 cup water
1 cup sugar *divided
1/2 cup (1 stick) butter
1/4 tsp. vanilla extract
8 canned biscuits (buttermilk)
4 tsp. ground cinnamon

Preheat oven to 375 degrees.

Peel, core and slice apples vertically into 8 slices each. Cover with water to keep them from getting brown.

In a medium saucepan, mix the water, 3/4 cup sugar, butter and vanilla over heat and bring mixture to a boil.

Separate each biscuit into 2 layers. Wrap a biscuit layer around a slice of apple, stretching it to slightly overlap and seal the bottom. (I used my mini Silpin to roll them out since stretching them wasn't working too well for me.)

Place the wrapped slices sealed side down in a 9 X 13 baking pan. Pour the hot sugar mixture over the apple slices.

Mix the remaining 1/4 cup sugar with cinnamon and sprinkle over the tops of the wrapped apples.

Bake for 35 minutes or until golden brown. Serves 8

Tuesday, July 27, 2010

Gad-Zukes!

Zucchinis are a prolific little plant. Or, at least, so I’ve heard.

Every year I plant zucchini plants, hoping for the vast harvests I hear about.

And yet, every year, my plants bloom like crazy and then....do nothing.

Yep, I got nothing.

Fortunately for me, there is never a lack of zucchini overload to be had from friends and family who can’t get rid of their motherlodes fast enough.

Such was the case this week when a friend of ours practically begged me to take his extra zucchini and yellow squash to work and give it away for him.

And, as with every other year, the very first thing I want to do with zucchini is make a zucchini cake. Don’t get me wrong, I love to grill it, too, but for that I love the really cute little zucchinis that I can just slice in half and throw on the grill. When it comes to the garden monsters I frequently grab from our lunchroom free-for-all table, its gotta be zucchini cake.

And when it comes to zucchini cake, there is only ONE recipe that will do. My mom’s.
I know, everyone thinks that their mom’s recipe is the best, but mine really is. Everyone loves it, and constantly begs for the recipe. And, until now, I’ve never....EVER....given it up.
But, Mom gave me the go-ahead to post it, so if you are a zucchini lover, this is your lucky day!

Ty's Grandma's Zucchini Cake
4 cups grated zucchini – set aside
1 ½ cups oil
3 cups sugar
4 eggs, beaten
1 tsp vanilla
3 cups flour
1 ½ tsp baking powder
1 tsp baking soda
2 tsp cinnamon
1 tsp salt
1 cup chopped nuts (optional)

Preheat oven to 300 degrees.

Peel, then grate the zucchini, discarding any large, seedy sections. Press grated zucchini between paper towels to eliminate some of the liquid.

Beat together the oil and sugar in a large mixing bowl. Add in the beaten eggs and vanilla.

In a separate bowl, mix together the dry ingreditents and add the mixture into the wet ingredients.

Mix in the zucchini and nuts (if using),

Grease and flour a 9x13 pan (I spray with Baker’s Joy). Pour batter into prepared pan.
Bake at 300 degrees for 1 ½ to 2 hours or until toothpick comes out clean.And, although my mom says the cake is plenty sweet and moist for her without it, I've never been able to resist topping this cake with cream cheese frosting.I know, this isn't the greatest picture in the world, but just LOOK at how moist that cake is.
WARNING!! WARNING, Will Rogers!!! This is NOT good for you!! But, I firmly believe its worth the risk.

Thanks, Mom!!!

Monday, July 26, 2010

Easy "Breezy"

It was a long weekend. Short, but yet, looooong....

As in, I didn’t get nearly enough accomplished, but we had our fair share of stress and frustration. My son is tentative by nature and its hard to get him to try new things. So, whenever something comes up that is on his list of “things Ty likes to do” we try and make sure we do them.

For example, we heard that at the county fair last week, there was going to be a fireworks display after the country concert Friday night. Well, Ty loves fireworks, so we left the house late and got there in time to walk around a bit and have a little fun before the fireworks started.

We took him to the creepy guy making balloon animals (badly, I might add), we let him take a couple of runs at the RC race track game on the midway, and then we spotted the pony rides. Ty does enjoy a pony ride, so I considered it well worth the $5 to watch him clinging to the saddle horn on that itty bitty pony for dear life. (Seriously, those were some of the tiniest ponies I have ever seen. The one Ty was on looked like he was WEARING him. But, I digress....)

The little equestrians were about a minute or so into their ride, when suddenly, and completely without warning, the fireworks started.

At which point, the ponies positively WIGGED OUT.

Which proceeded to make the kids FREAK OUT.

And we very nearly had a bad accident. I’m amazed none of the kids got thrown. The guy running the ride did his best to calm the ponies down, I’m assuming his theory was “keep them walking and they’ll be fine”, but he was wrong.

The parents were out there in a heartbeat, walking next to their kiddos, but when Ty started trying to climb me like a baby ‘coon, I told the guy, “Hey, I’ve got to get him off this NOW” he yanked the ponies to a stop and looked visibly relieved when the rest of the parents followed suit and removed their panicked children as well. He said to me, “Wow, they really didn’t give us much warning, did they?” He was clearly less than thrilled with the situation, himself, and considering that we were practically beneath the fireworks, I don’t blame him. There could have been a very serious accident.

So, skittish little boy clinging to his momma, we walked over and tried to turn the fireworks into the fun display they were meant to be.

Instead, we now have two LESS activities that we can do with Ty, since he has now decided he no longer likes ponies OR fireworks. *sigh* I need a drink.

I remembered seeing this in Mark Bittman’s How To Cook Everything when I was reading his Tequila Sunrise recipe a few weeks ago. I’ve never tried a Seabreeze, but have wanted to since the first time (of many, many times) that I watched the movie French Kiss. "Seabreeze? Does that translate?"

This seemed like a pretty good time to give it a shot. The recipe makes enough for several drinks, but I cut it back to one. Okay, so I did it twice, so, technically, two. But hey, I deserved it. Switch the “cup” measurements to ounces instead and you should be a-okay.Seabreeze (a la Mark Bittman)
¾ cup vodka
1 ½ cups grapefruit juice
1 ½ cups cranberry juice
Lime wedges for garnish

I poured mine over ice and then squeezed the garnish into my drink for some extra punch. Two of these and I was feeling MUCH better about the ponies. And the fireworks. Now I just have to deal with my boy going off to Kindergarten in a few weeks. *sigh* Its always something. Good thing I still have some vodka....

Monday, July 19, 2010

Wonder Pets, Wonder Pets, We’re on Our Way....

A few months ago, I discovered that there was going to be a production of Story Time Live appearing in my area. I promptly got in touch with Brayden’s mom (Ty’s best friend) and we ordered tickets. At which point. I realized. My mistake.

Are you KIDDING??? What parent in her right mind would willingly, eagerly even, subject herself to the Wonder Pets on stage.

Well, frankly, any mom who wants to see the look of sheer joy on her child’s face. Oh, yeah, and who feels like dropping a couple hundred bucks to do it.

Yes, I am insane.

For those of you who haven’t recently been acquainted with a preschool aged child, Story Time Live is rather like Disney on Ice. Except instead of Disney its Nick, Jr. And its not on ice.

Instead, it is the characters from four of my son’s favorite TV shows, performing special stories on stage. I fully expected this to be a parental nightmare, with a theatre full of preschoolers and their stressed out parents, laced with sugary treats and overpriced specialty merchandise.

Well, I was partially right. The show merchandise was, indeed, seriously overpriced. The show, however, was surprisingly pleasant, since Brayden’s mom and I spent the vast majority of it watching our sons become magnetized to the stage, in drooling awe of their little fuzzy heroes. The frenzied sea of children was actually a very well behaved group with only a few stray criers, and I suspect that the other parents were also so relieved at the unexpected pleasantness of the afternoon that I didn’t encounter a single grouchy remark or misplaced elbow in the line to exit the theatre.

My one comment to Nickelodeon (other than the horrifying merch prices) would be that the costumes were crap. I’m sure they were well made, high quality garments, please don’t get me wrong. However, the kids were confused.... I mean, I understand that Ming Ming was actually a person wearing a Ming Ming suit, but at this age, these kids don’t really get that, and really didn’t understand why the Backyardigans had human faces and voices. And really, why IS Boots the Monkey bigger than Dora?

And, hello, I’m not even going to TALK about Tuck the Turtle being anchored to his human counterpart’s pelvic region....

I think the show would have been a MUCH bigger success for the kids if they had just made full costumes that actually LOOKED like the characters. After all, this IS for the kids. The parent’s aren’t under any illusions and have no real need to be entertained. But now, I’m afraid, my boy is going to have questions about whether or not Swiper is really a fox. Hmmm.

All in all though, it was a very nice event, the kids had an absolute blast, and now we’ve opened the door (potentially) for more live events. As a bonus, the Fabulous Fox Theatre in St Louis is a true gem of historical buildings (my girl, NV will love that reference!) and a real treat to have such a pleasant staff on hand to get us through it.
Here are a few shots of the festivities for you!
First up was Ni Hao Kai Lan, but we were so engrossed in our boys that neither of us even got a picture. This is what we saw through the entire first half of the show.What you can't see is that they were both perched on the very edges of their seats.Next up were the Backyardigans.I mean, LOOK at the expression on Ty's face!The Wonder Pets were up next....And then there was Dora. None of my pictures of Dora turned out well except for this finale group shot where you also get Moose A. Moose and his friend Zee D. Bird.
Really, I mean, looking at that face, it was worth every penny.Is there really anything else to say?

Pineapple Ginger Sorbet for I Heart Cooking Clubs

It really doesn’t get any easier than this.

Looking for a nice, light dessert for a hot summer evening, I turned to our dear friend Mark Bittman. And, as usual, I was not disappointed. I have said in the past that Bittman’s recipes are the epitome of ease and simplicity (Duh, that’s why he’d called “The Minimalist”.) but this recipe just goes above and beyond.

I’ve been on kind of a gelato/ice cream/sorbet kick lately. I recently ordered Bittman’s book, The Minimalist Entertains, and found this chilly treat on his menu for an Asian Grilled Dinner. I don’t even need to look up the recipe....there are only three ingredients.

4 cups pineapple puree (Admittedly, I’ve never seen this in the store, but I bought 2 cans of crushed pineapple and demolished it in my food processor instead.)
1 cup sugar
1 TB ginger (fresh, dried or candied)

Mix all three ingredients together and freeze it in an ice cream maker.Bittman says this is best straight out of the machine or after no more than an hour in the freezer. I couldn’t agree more. Naturally, I doubled the ginger, but that’s just how I roll. Other than that, I made no changes. This recipe is the essence of perfection. Fresh, cool, and flavorful, it just caresses your mouth and makes you utter noises that probably shouldn’t be heard at the dinner table.

Need a quick and tasty dessert in a hurry? Try this one. Keep a couple of cans of pineapple in the pantry and it’s a no fuss-no muss dish that will have your dinner guests raving...and mumbling sweet obscenities under their breath....if my experience is any indicator...

I’m already thinking of variations on this one to try.....stay tuned....I may just get inspired!

This is my submission for this week's theme over at I Heart Cooking Clubs - POTLUCK!

Friday, July 16, 2010

The Ten Spot - Tisdale Moscato

Ladies and Gentlemen, I would like to introduce you to my new favorite little wine. I have to thank my friend Mendi for introducing me to this one. She had a glass of this at a restaurant a while back and asked me if I knew where she could get it.
I happened to know that our local grocer carries the Tisdale label, but not the Moscato; only the standard four varietals. But, being the shameless person that I am, I went straight to the guy who does their ordering and asked if he could get us some. (And by “some” I mean a case of it for us to share.)
I admit, when she first mentioned it to me, I was a little hesitant because I knew that the other Tisdale wines retailed for about $3.49 a bottle. Now, you won’t find me complaining about a cheap bottle of wine, but when you go below the $5 mark, you just never know what you’re getting into.In this case, I was very pleasantly surprised. I’m not going to try and blow smoke and tell you this is a fantastic wine and to rush out to your local liquor store and demand that they carry it. But it IS a wine that will be taking up permanent residence in my wine rack....if I can manage to keep from drinking it, that is.
The Tisdale Moscato is a very light white wine, definitely on the sweet side, but not sickeningly sweet like so many I have come across. It is refreshing and clean enough that it makes a great go-to wine for every day drinking and pairs well with just about anything on the grill, making it a great summer choice. Crisp and citrusy, it is a winner in my book, and at under $4 a bottle, a can’t-miss pick!
You can learn more about the Tisdale wines on their website.

Thursday, July 15, 2010

Parmesan Fillo Asparagus

When I first saw this recipe, I knew it was something I had to try immediately. We are not in the height of asparagus season any more, but it is still readily available and I have not yet had my fill! I am including my version of the recipe below with the changes I made to the original. The measurements are approximate, depending on the number of spears you have, etc.

Although I intended to post this earlier in the season, it isn't easy to come by a package of fillo in my neck of the woods, so it took awhile for me to gather my ingredients! Let me tell you though, this one was worth the wait! And, its definitely a keeper. These would be perfect to have prepped and ready to bake, then pop them in the oven right before your guests arrive for a terrific appetizer. The hubs also pointed out that they would probably be good with a little Frank's Red Hot on them. I would agree, but this batch was actually plenty spicy with the amount of red pepper flake that I used. Since the measurements are all "to taste" you can make them as mild or as spicy as you want.

Parmesan Fillo Asparagus
20 asparagus spears
1 packet fillo

4 TB unsalted butter, melted

1 cup freshly grated Parmesan
red chile flakes
salt and pepper

Peel the stalks if the asparagus is tough skinned.
Open the fillo sheets and remove one at a time from the packet.
Cut in half and brush lightly with butter.
Sprinkle on the Parmesan and a few chile flakes, then season with salt and pepper.
Lay a raw spear of asparagus along the edge of the pastry and roll it as tightly as possible. The original recipe said to blanch the asparagus first, but unless your spears are particularly thick, I wouldn't. Mine were pretty thin, so I put them in raw and it worked perfectly. I think if I had boiled them at all first, they would have come out mushy.Place on a baking sheet. Repeat with the remaining asparagus and place the tray in the fridge until you are ready to put them in the oven. (These can be done in advance, just cover with plastic wrap and leave in the fridge until you need them.)

Preheat the oven to 350. Place the trays into the hot oven and bake for about 7-8 minutes until golden brown. Pile the spears on a plate and top with freshly grated Parmesan. Serve immediately - these are best while hot. These were really fantastic and I'll definitely be adding them to my party recipe box!

Wednesday, July 14, 2010

A Girls Night In with Mark Bittman for I Heart Cooking Clubs

When I think of a Girls Night Out, I think of ditching the men, getting Barbie’d out and dancing our butts off in some too-loud bar that I am too old to be seen in.

On the other hand, a Girls Night In is just as fun, without all the sweat, stress, and body contouring foundation garments.

So, when I saw the I Heart Cooking Clubs theme for this week, I knew just the ticket. Cocktails and finger food. And since Ginny was about to come for a visit (yes, I did this recipe weeks ago, knowing about the theme, and just waited to post about it), it was the perfect setting for a Girls Night at the house. I even managed to get the hubs to locate himself elsewhere for the evening, so as not to disrupt our girliness.

So what was on the menu? Well, God bless Mark Bittman, cuz he knows his shrimp. We fired up the grill and skewered some of his Spicy Grilled Shrimp, which we served with grilled tequila pineapple skewers and Mofongo. Mofongo is not a Bittman recipe, but a carryover from Ginny’s recent trip to Puerto Rico that she was itching to try back here in the landlocked Midwest. It is a dish that takes roasted, mashed plantains to a new level.

And since I did say “cocktails” I looked to our buddy Mark again. We sampled a variety of libations, including his Tequila Sunrise (from How to Cook Everything), an old standby from my bartending days.We also had Cherry Margaritas and Lemon Basil Mojitos (a recipe Ginny brought with her that is a lovely blend of Bacardi Limon, our fresh sour mix, club soda, fresh mint, basil and lime).TEQUILA SUNRISE
From Mark Bittman’s How to Cook Everything

1 cup tequila
Orange juice as needed
Grenadine

Divide the tequila evenly between 4 glasses.
Add orange juice and a few drops of grenadine, as desired.
Mark Bittman's Spicy Grilled Shrimp
From Fish, The Complete Guide to Buying and Cooking, by Mark Bittman
Makes 4 servingsTime: 20 minutes


2 pounds large shrimp
1 large clove garlic
1 tablespoon coarse salt
1/2 teaspoon cayenne pepper
1 teaspoon paprika
2 tablespoons olive oil
2 teaspoons fresh lemon juice
Lemon wedges
Peel the shrimp (you can butterfly them if you like; just cut along the line of the vein, a little deeper than usual). Mince the garlic with the salt; mix it with the cayenne and paprika, then make it into a paste with the olive oil and lemon juice. Smear the paste all over the shrimp. Start a charcoal or gas grill or preheat the broiler; the fire can be as hot as you like. Grill or broil the shrimp, 2 to 3 minutes per side.Serve immediately or at room temperature, with lemon wedges.Now, clearly, as a former bartender, I didn’t need a recipe for the tequila sunrise, but since there was a rendition of it in Bittman’s HTCE, I thought I’d go ahead and include it here for your reference. What we REALLY did was pour a shot (or so) of good tequila in each glass, then topped that with a orange-pineapple juice blend (since we had a “pineapple” theme going already). Just as a rule of thumb, the proportions should be about 2 to 1. Two parts juice to one part alcohol. Then, very carefully, drizzle a little bit of grenadine around the edges of the drink. As the syrup falls into the glass, it makes the famous “sunrise” effect, as you can see in the picture.

For the shrimp, we actually followed Bittman’s recipe. Although I usually find that I have to supplement the seasonings in his dishes, I was pleasantly surprised to find that these little babies had plenty of oomph just as they were. I couldn’t keep myself from nibbling on the last of these at the end of the evening, even though I was much too full to be eating any more. This would be a fabulous appetizer for any cocktail party!

I have to say, the traditional mojito is not my favorite drink. Apparently, even though I like mint, I don’t care for it in my beverages. However, the Lemon Basil Mojito was a revelation that I look forward to having again and again! Tart and sweet at the same time, it had just the right amount of bite with an herby undertone.

All in all, we had a fabulous Girls Night In! A few cocktails, some tasty treats and a movie or two rounded out the evening perfectly.

Tuesday, July 13, 2010

Rhubarb-a-Rama

Every so often, Ginny asks me a crucial question. Well, shortly before her recent visit to the Boondocks (aka, my house) she was visiting her folks out in Des Moines. From their house, she calls me.

Ginny: So, um, how much rhubarb should I bring out with me?
Me: As much as you can carry.

Ask a silly question.....

Well, in any case, she ended up bringing somewhere in the neighborhood of ten pounds of gorgeous rhubarb stalks with her, and a long list of ideas for what to do with it. I am a huge fan of rhubarb (still have those memories of cutting stalks from our patch in the back yard when I was a kid, dipping it in sugar and snacking on it), so this was no problem for me at all.

From this plethora of tart-a-liciousness came the following:
Rhubarb-Ginger Jam
and

Rhubarb Ginger Jam

Ingredients
3/4 lbs. rhubarb stalks, chopped in 2″ pieces
1 cups sugar
1″ piece peeled ginger
1 cinnamon stick

Directions
Quarter 1″ piece of ginger.
Place in a large saucepan with sugar, ginger, cinnamon stick and 1 cup water. Simmer over medium-low heat, stirring occasionally and skimming foam as it rises, until rhubarb is soft and syrup begins to thicken, about 15 minutes. Remove rhubarb with a slotted spoon and set aside.
Continue simmering syrup until very thick, another 7–10 minutes. Remove from heat.
Discard ginger and cinnamon, return rhubarb to pan, stir, and cool for 5–10 minutes.
Pour jam into jars and allow to cool.
Store in refrigerator for up to 1 month.
Rhubarb-Ginger Syrup
makes 1 jar to keep, plus a little to use right away; can easily be doubled or tripled

1.5 cups white sugar
1 cup water
2 cups thick-sliced rhubarb stalks, leaves discarded
1 cup chopped ginger (no need to peel)

In a medium saucepan, bring the sugar and water to a simmer, stirring to dissolve. Add the rhubarb and ginger; return to a simmer, then reduce heat and let slowly bubble until the rhubarb is thoroughly soft. Remove from heat and let steep for 30 minutes. Meanwhile, line a metal strainer with cheesecloth, and place it over a heatproof bowl. (If you want crystal-clear syrup, use a muslin jelly bag and be prepared to wait for gravity to draw the liquid into the bowl; be careful not to press or squeeze the solids.)

If you noticed, there does seem to be a theme here. And that theme is GINGER. We are both lovers of ginger, but Ginny is the more enthusiastic of the two. Needless to say, we may have used more ginger than the recipes called for. In the case of the jam, where the recipe calls for straining the ginger out and discarding it...well....that’s just wasteful. We put that ginger and some of the rhubarb in the food processor and put the resulting paste right back into the jam. Mmmm hmmmm.
Also. Both recipes recommend canning, but we opted to freeze the jam, and DRINK the syrup (it was excellent with some club soda and a little tequila).
NOTES: We quadrupled the recipe for the jam and doubled the recipe for the syrup so that we would have plenty, and use as much of the rhubarb as we could. The taste combination of rhubarb and ginger is absolutely phenomenal. The jam was like eating ambrosia and I’ll be hoarding my share and rationing it out over the winter. The syrup? Yeah well, the syrup didn’t last long in my fridge at all.....it is summer, you know....and you really should hydrate regularly.....

Monday, July 12, 2010

The Ten Spot - Liberty Creek Sweet Red

I have pretty eclectic taste in wine, but it does seem like lately I’ve been veering toward the sweet wines more than anything else. I wonder if that is a side-effect of the summer heat.

So, I suppose it should come as no surprise that I picked this bottle up during a recent shopping trip.

Partly because it’s the BIG bottle. And partly because it was $6.99.

This is definitely a “more for your money” bottle of wine. Sweet and fruity, it’s a little too easy to drink. You tend to forget that it is a double size bottle, so you may drink more of it in one sitting than you should.

What struck me about this particular wine, though, is that it is going to make a fantastic batch of sangria this weekend. Well, ok, I’m going to buy ANOTHER bottle to do that with, since I’ve already put too big a dent in this one, but you get my drift...

Ty and I are going to Story Time Live in St Louis this weekend with his best buddy and his mom. If you’re not familiar, this is basically Nickelodeon, Jr., live on stage. If you are acquainted with Dora and Diego, The Wonder Pets and all their friends, then you know what I’ll be going through on Saturday.

And so, surely you can understand why I’ll be picking up the big bottle and letting it marinate some fruit while we’re gone in St Louis. Because, after an afternoon with The Wonder Pets....well.....I’m going to need it.

You can check out this wine as well as Liberty Creek's other offerings on their website.

Saturday, July 10, 2010

Love me Tender.....loin..... Spicy Orange BBQ Pork

As much as I enjoy grocery shopping, there are weeks that I put off the weekly shopping trip day after day, trying to postpone the inevitable and hoping that I can pull just one more dinner out of the freezer. This has been one of those weeks. With the long weekend and the holiday throwing me off, our dinner routine has been a little out of whack. I’ll have to break down and go today or tomorrow, or I’ll feel the wrath of a 5 year old with no pizza; but this week, for just one more night, I pulled one out.

A few shopping trips ago, I picked up one of those cryo-sealed pork tenderloins and chucked it directly into the freezer to save for later. Wonderful little things to have on hand, they don’t take too awfully long to defrost and cook up in a flash.

Earlier in the day, I had been searching Tastespotting for a new marinade or sauce to put on the loin, when a Kraft Foods email came through, sporting a bit of inspiration. I’ll admit, I didn’t read much of the recipe, just enough to get the idea in my head, then went home and got to work.

First, I cleaned the loin, removing any excess fat and the silverskin. Then I lightly rubbed it with oil and seasoned it with salt and pepper (no time for a marinade last night, so a sauce or glaze was going to have to do).

While the hubs took it upstairs to his preheated charcoal grill, I mixed up the sauce. In true “kitchen sink” fashion, I pulled two partial bottles of barbeque sauce out of the fridge ad dumped the contents of each into a small saucepan on the stove. (way to clean out the fridge, mom!) To the mix, I added about ¼ cup frozen orange juice concentrate (I always keep some of this in the freezer for seasoning sauces and marinades), about a teaspoon of dark sesame oil, and a teaspoon or so of red pepper flakes. I simmered the mixture until the flavors came together and then took it up to the hubs, with the admonishment (as he was picking up the basting brush) “don’t start basting it too soon or it will burn”.

After which, I walked back down my wonderful new adjoining decks to the kitchen and started some potatoes. A superbly easy new side dish that is quickly becoming one of my favorites. I took two large baking potatoes and sliced them into three thick slices each, along the length. Just as with the tenderloin, a little oil, salt and pepper, is all they need. Then, back up to the deck and on the grill they went.

At which point, I poured myself a glass of wine and headed to the couch to catch up on the “Demon Hunting Soccer Mom” piece of fiction I’ve been reading this week.

After just a short while, a beaming hubby came back from the deck bearing a lovely platter of pork and potatoes. The tenderloin was moist and tender, perfectly cooked with just a hint of smoke (nice job, hon!) and the potatoes (admittedly, they went on too early and a couple got charred) were a nice accompaniment.Notes on the sauce/glaze: With the meat cooked just right, this didn’t need a marinade at all. The glaze had a terrific flavor. Just the right amount of orange and sesame, but I think next time I’ll add more red pepper. The flavor was wonderful, but next time I want a little more heat. The only thing I might change would be to fire up the heat at the end so that the glaze actually “glazes” the meat instead of just saucing it, but it still worked out well. The hubs and I both enjoyed it, so this one will definitely be a keeper at my house.

Friday, July 9, 2010

Winner, Winner, Chicken Dinner!

Good morning, everyone! Today is a good day, thanks to all of you. Two years ago, I started this little blog, not quite knowing where I was headed with it. I just knew I had to do it.

And I’m so glad I did. Writing posts and reading so many by other bloggers has really opened up a new world of possibilities for me, and I am hoping that will continue in the NEXT two years!

Last month, I issued you all a challenge. Granted, I bribed you, but you really came through for me, posting a record number of comments on each and every post over the last four weeks.

And, yes, you shall be rewarded. Or, more specifically, ONE of you shall be rewarded.

I have been saving each and every one of your comments and put them all in a basket last night. Since you’ve all become like friends to me over the last two years, I wanted to do something a little more personal than just plugging you into a random number generator. So, I gave the basket to my Little Man, and told him to close his eyes and pull out one piece of paper. And he did.(here he is in his new favorite outfit, his Toy Story 3 green army guy pajamas, pulling the winning name)

DRUMROLL, PLEASE.....

The winner is.....

KRISTA!Krista won her prize with this comment:
A big congratulations to Krista! She really put in the extra effort on this one, leaving more than 13 comments during the contest, which really ramped up her chances of winning. While she didn’t have the most comments (David came in with more than 20!), in the end, upping her odds really did the trick, as she held a large number of the entries.

You deserve this one, Krista! I hope we get to see some of the tasty treats the come out of it over on your blog! For those of you who missed the Big Reveal earlier this week, this is what Krista will be receiving:
Congrats, again, and thanks to everyone for giving me such a great blogaversary! I’m already looking forward to next year!

Hey Krista – email me your shipping info at bethanneleach@gmail.com so I can get your prize to you in time to use it for all your summer produce!

Thursday, July 8, 2010

Happy Blogaversary to Me!

The day has finally come, everyone! Two years ago today, I started writing, posting pictures and sharing recipes, making this little corner of the blogosphere my very own. It has been wonderful and I have all of you to thank for making it that way.

What does this mean?

Today is the last day to enter my giveaway! Yep, yet your last comment or two in on today’s posts and you may be the lucky winner of my very special prize. I will be drawing the winner’s name tonight, so be sure to get your comments in by mid-day today. Good luck to everyone!

I will post the winner’s name tomorrow morning – stay tuned!

The Basics – Beef Stock

I am a grocery shopping fool, I admit that freely. But one thing I rarely buy is any kind of stock or broth. Why? Because it is so darn easy to make. And cheap, too.

If you’ve never done this, I highly recommend giving it a try. As much soup as I make over the fall and winter months, I go through a LOT of stock. At roughly $2.50 a box, it adds up. Especially when you need 2-3 boxed for a crock pot of soup.

So here’s what I have learned over the years.

Whenever you cook meat (chicken, beef, turkey, whatever) save the bones and extra bits of meat. Roast a chicken, save the carcass. T-bone steaks? Don’t you dare throw those bones out. Turkey? If you don’t use the neck for gravy, pop it in the freezer. Yep, keep a gallon size Ziploc bag in your freezer and just keep adding to it as you accumulate tidbits. I usually tend to throw in a package of soup bones from my freezer as well, just for extra meaty flavor.

Same goes for veggies. You know that bag of carrots in your vegetable drawer that is going dry on you? Stick the whole thing in the freezer. Is your fridge too cold and froze your celery? Add it to the carrots. I even save the ends and peels of onions I chop for other dishes. Garlic that has started growing sprouts, etc....

Then, when you have a bag full of veggies, and a bag or two of bones, you are ready to make stock.

Dump all of your salvaged leftovers into the biggest stock pot you own. Add in an onion or two (quartered, no need to peel) and a head of garlic, sliced horizontally. Toss in some herbs and whole peppercorns. I like making stock in the summer, just because I have a garden full of fresh herbs I can toss in. In my case this weekend, I had a fist full of chives, rosemary, sage, and oregano.Then, fill the pot with water, as full as you can. There is really no recipe for stock, you just use what you have. The only trick is to not add too much water for the amount of food you have in the pot. Start by covering the solids and go maybe another inch or two. Remember, you can always add more water if its too strong, but you can't add flavor if it is too weak.Bring this hodge-podge to a boil, and then reduce the heat and let it simmer for awhile. Like a couple of hours. Basically, you’re sucking the life-blood out of all the bones and veggies, so just let the sucker cook. I think I left mine on for 2-3 hours. If you have a smaller pot than my 20 quart giant, it may not take as long.

Taste the liquid occasionally to make sure you’re getting enough flavor, and feel free to add more herbs or seasonings as necessary. Once you think the concoction is where you want it, turn the heat off and strain off the solids.
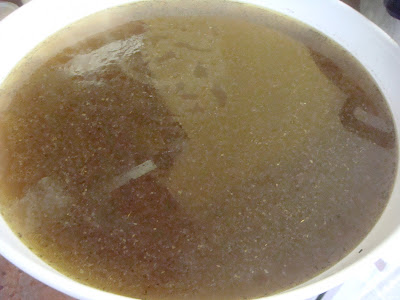
Then, separate the fat from the liquid either by using a gravy separator, or letting the stock chill and peeling off the layer of fat. I use the first method, since my pot is too big to fit in my fridge. Now, that being said, you don’t have to skim off the fat completely. A little fat gives the stock some flavor, but use your own judgement.

If you’re picky (and I am not) you can strain your stock through cheesecloth or a clean tea towel to strain off any impurities (also known in my house as floaties, or sludge). Personally, I get the biggest stuff out of it, and then leave the rest, because it is also known as “flavor”.

Then, you are done! All you have to do is funnel the stock into jars or other containers (I like the large Glad-lock containers. They hold 4 cups of liquid and the lid screws on tight.) and pop your stock in the freezer. Unless you plan on using a large quantity at one time, I recommend using containers that hold no more than 4-6 cups, otherwise you’ll be defrosting too big a quantity to use at one time. You’re set for soup season!Some people tell me that making stock is too intimidating or time consuming. I will agree, making your own stock does take time, but it is really a hand off process. If you’re going to be at home on a weekend day, all you have to do is pop it on the stove and let it go. Best of all, it is made almost entirely of items you would otherwise have thrown away. Our grandparents had it right – why throw something away that you can use again?

I smell BACON!!! Better with Bacon for I Heart Cooking Clubs

It is true what they say... everything IS better with bacon... but what I want to know is...
WHY THE HELL DIDN’T I THINK OF THIS???
Mark Bittman continues to make me smack my head in a “Coulda had a V8” kind of motion.
I mean, come on....
Bacon.... waffles....
bacon. waffles.
BACON WAFFLES!!!
Seriously, people. I love bacon and I love waffles. I love bacon WITH my waffles... why wouldn’t I have thought of having bacon IN my waffles?? The version of this that I ran across on the internet used a belgian waffle maker, pouring the batter onto the grates, and laying a couple of slices of cooked bacon across the batter before closing the lid.

The recipe originates from Bittman’s How to Cook Everything as a variation on his Quick and Easy Waffles. He offers a basic waffle recipe with eleven, count ‘em, ELEVEN options for variations. I decided to employ two of those variations in the same waffle.

The first of which was to add cheese. I know what you’re thinking, cheese in a waffle? Well, really, when you go through the McDonald’s drive through (and I know you do, you don’t even have to admit it here, I’ll keep your greasy little secret) don’t you ask for your McGriddle with cheese? Or your McMuffin? I know I do. So the combination didn’t seem at all strange to me. Although the hubs did look at me a little funny. I chose to let him stew with it instead of trying to explain my logic to him.

SO, I added about a half a cup of shredded sharp cheddar directly in the batter.

In his suggestion for a bacon waffle, he says (as in the internet version I found) to lay a couple of slices of bacon across the uncooked batter before closing the lid on the waffle iron. He also says the bacon cooks along with the batter, implying that it would be raw bacon I am putting on the waffle batter. Not that I have a problem with raw bacon, I don’t, but in the other version I saw, the writer specifically stated that it was cooked bacon she added. Hmmm...confused.

In either case, I decided that I wasn’t sure if I liked the idea of whole slices of bacon seared to the side of a waffle. I’m envisioning a whole strip breaking loose and hitting me in the chin with a maple syrup coated “thwack!” and frankly, that doesn’t strike me as an appealing scenario. Plus, how do you guarantee that you get bacon in every bite? Or waffle? I was thinking the bacon should complement the waffle, instead of either playing second fiddle, or overshadowing it.

You know what I did? I cooked my bacon up all nice and crispy. Then I crushed it up into yummy little bacon bits. Then I sprinkled the bits over the batter so they would end up in every little crevice of the waffle. The result? Well, you’re just going to have to try it yourself and find out, because you can’t have mine... don’t even try... I WILL stab you with my fork... Its friggin’ genius, is what it is. I’m tempted not to even show you these pictures. But, because I’m a sick, sadistic kind of bitch... I’m going to anyway. Go ahead.... drool.....

Quick and Easy Waffles
from How to Cook Everything by Mark Bittman
canola or other neutral oil for brushing the iron
2 cups flour
½ teaspoon salt
2 TB sugar
3 tsp baking powder
1 ½ cups milk
2 eggs
4 TB butter, melted and cooled
1 tsp vanilla extract, optional
Brush the waffle iron lightly with oil and preheat it.
Combine the dry ingredients. Mix together the milk and eggs. Stir in the butter (and vanilla, if using).
Stir the wet into the dry ingredients. If the mixture seems a little too thick to pour, add a little more milk.
Spread a ladleful or so of batter onto the waffle iron and bake until the waffle is done, usually 3 to 5 minutes, depending on your iron.Variations:Add grated mild cheese, such as Cheddar or Jack, about one cup per batch of batter.
Lay 2 or 3 strips of bacon across the batter after spreading onto the waffle iron and before closing the lid. Bacon will cook along with the waffles; cooking time may be a minute or two longer.

This is my submission for this week's "Better with Bacon" theme for I Heart Cooking Clubs.

Wednesday, July 7, 2010

S'more Krispy Treats

There is a guy that I work with who is just a fool for a rice krispy treat. He even tried to institute a “rice krispy treat day” where we would take turns bringing in rice krispy treats every week on a specific day.

Yeah well, that didn’t fly so well...

BUT. His birthday is this weekend. So, in honor of the Krispy King himself, we decided to surprise him with a “Krispy Treat” buffet for him today at work.

Since I am the kind of person who can never do anything the traditional way, I did a little bit of recipe browsing and came up with an idea from the Kellogg’s website. I think they call them Rice Krispy Chocolate Yummies, or something like that. I call them “S’more Krispies”!

It doesn’t get a whole lot easier than this, and it only took me about ten minutes. I didn’t even need to fire up my oven or stove.
The result? oh dear lordy these were good. And rich. I think you could almost do without the peanut butter because it really pushed it over the top. They were a winner for sure, and a keeper for the recipe box.
(yep, I’m using the picture from the Kellogg’s website. Why? Because mine are all GONE.)

S’more Krispies
· 7 Crackers Keebler® Grahams Original
· 2 1/2 cups miniature marshmallows
· 1 package (12 oz., 2 cups) semi-sweet chocolate morsels
· 2/3 cup light corn syrup
· 3 tablespoons butter or margarine
· 1/2 cup crunchy peanut butter (I used creamy)
· 3 cups Ready-To-Eat Cereal Rice Krispies®

1. Coat 13 x 9 x 2-inch microwave-safe dish with cooking spray. Arrange KEEBLER GRAHAMS ORIGINAL crackers in single layer in dish, breaking crackers as needed to fit. Sprinkle marshmallows evenly over crackers.
2. Microwave on HIGH 1 minute or until marshmallows are puffy. Remove from microwave. Cool completely.

3. In 2-quart microwave-safe mixing bowl combine chocolate morsels, corn syrup and butter. Microwave on HIGH about 1 1/2 minutes or until chocolate is melted, stirring every 30 seconds. Stir in peanut butter. Add KELLOGG'S RICE KRISPIES cereal, mixing until combined.

4. Spread evenly over marshmallows. Cover and refrigerate about 1 hour or until firm. Cut and store in airtight container in refrigerator.

The Ten Spot - Mad Housewife Merlot and Ruby Truffles

A couple of weeks ago, I posted a Ten Spot about the Mad Housewife Cabernet Sauvignon. It was a decent little wine. I will admit, it didn’t excite me, but for under $6 a bottle, it didn’t need to, I was just happy to have a decent bottle to drink that night.

Wasn’t I surprised when a member of the Mad Housewife staff commented on my post! (Hmmm haven’t heard anything about that t-shirt he wanted to send me tho...)

Well, I am all about getting feedback from my fellow bloggers and readers, and it gave me the push I needed to go check out their website, which is not something I normally do when I pick a wine. Lo and behold! They have a FOOD section. Wine and food, two of my favorite diversions in life. I greedily browsed the recipes available there and it didn’t take me long to pick a recipe to try. Why, one that calls for WINE, of course!

I have cooked with wine on numerous occasions, but I am always interested in a dessert recipe that lists wine as an ingredient. And, I found that in their “Ruby Truffles”.

A simple enough recipe, I added the necessary ingredients to my shopping list and headed to the store (oh, darn, I have to buy a bottle of wine...shucks.)

It was a shame that the recipe only called for a half a cup of wine...that left me with almost a whole bottle to do something with. I couldn’t think of anything else, so I rallied my resolve and drank it. It was a real struggle. Italian girl....red wine....yeah, I was devastated. (you really should know how sarcastic I can be by now.)(as you can see, the bottle didn't last long)

And, I have to say, pleasantly surprised! I usually can’t drink Merlot. It’s just too tannic for me and I end up with a raging headache after just a glass or two and a case of the ol’ “black tongue” the next morning. Seriously, after a glass of Merlot, I usually wake up, go to brush my teeth and my tongue looks like it belongs to a victim of the plague. Its nasty.

Doesn’t stop me from trying though.

After my only “average” experience with the Cabernet, I honestly wasn’t expecting more than that from the Merlot, but I am happy to say I underestimated it. Very light on the tannins, and full bodied, I had no trouble at all putting away the rest of the bottle (no, I don’t mean in the fridge, and yes, I’m fully aware that I’m a wino, thankyouverymuch.). There were a lot of great fruit undertones in this bottle and no case of the black tongue the next morning! (yay!) This bottle is in the lineup for my next pasta dish. I think it will lend great flavor to the meat sauce I’ll be making next week.

**DISCLAIMER – no, I am not just saying this to get Mad Housewife to send me a shirt. You all know by now that I am enthusiastic when I like something, and a real bitch when I don’t, so you can be sure I’m nothing if I’m not honest. I was not paid or otherwise compensated for this endorsement. And yes, I really do have another bottle of Merlot on my shopping list. Now...let’s see if I can brave the Chardonnay.

Now! On to the truffles!Let me start by saying, there are very few recipes that are this easy. It’s one of my favorite kinds, much like pesto, where you dump everything into a food processor and give it a whirl. The only spot where I ran into trouble was in forming the balls. The recipe indicated that the dough would be stiff, and it did appear that way in the bowl, but in reality it was too soft to handle. I ended up freezing the dough until it was firmer to form the balls and roll them in sugar. The recipe also says to bring these to room temperature before serving, but honestly, once they start to warm up, they tend to go soft again, so I am serving mine to my co-workers today straight out of the fridge. Maybe I did something wrong, maybe it was just a variation in the brand of vanilla wafers, I don’t know. They were still tasty though! They actually remind me a lot of a recipe from my friend Tara’s mom back in Ohio that she called Pomanders. We always had them at the holidays and they had a base of vanilla wafers as well. So, for me, this recipe was a bit nostalgic and made for quite a sweet afternoon! They are not as rich as a standard truffle, so don’t be expecting that. They do not have the typical chocolate base that you are familiar with, but have a nice dense texture and give off just a hint of the wine.

After making the first batch, I think next time I will try doubling the amount of wine and then reducing it to about half the volume for a more powerful taste. We’ll see how that goes!

Thanks, Mad Housewife, for a nice bottle of wine and a great recipe idea!

“Ruby” Truffles
1 box Nilla Wafers
¾ C powdered sugar
¼ C cocoa powder
3 T light corn syrup
1 tsp. vanilla
½ C Mad Housewife Wine – Merlot
1 C red decorative sugar
In food processor, process wafers to the consistency of coffee grounds; add powdered sugar, cocoa powder, corn syrup, Merlot and vanilla. Process until dough becomes evenly mixed with all ingredients (dough will be stiff). Shape into 1 inch balls and roll in decorative sugar.
Store in covered container in refrigerator. Allow to come to room temperature before serving.

Tuesday, July 6, 2010

The Big Reveal!

Wow. I just have to say, wow! You guys have been so great with this contest I’ve been running. I have seen a huge amount of participation and I just wanted to let you all know how much I appreciate it! There are definitely a couple of “front-runners”, if you will. Not that the person with the most comments wins, but there are definitely couple of stand-outs who CLEARLY want to win the mystery prize.

And, ironically, they both have a very good idea of what the prize is going to be! So, today, I’m going to tell you.

Yes, it’s all about Canning and Preserving.I started off with a fantastic book for the winner. Sherri Brooks Vinton’s "Put 'em Up!: A Comprehensive Home Preserving Guide for the Creative Cook, from Drying and Freezing to Canning and Pickling" which was just published a few weeks ago.

Added to that are some essential canning supplies, including a Ball Canning accessory set, a package of Ball freezer jars, and some canning labels. The winner may even find another surprise or two in the box if I get to feeling frisky before the end of this week.

WHICH REMINDS ME! (Okay, so I didn’t forget. After all, it IS the point of this post...)

Thursday, July 8th is the last day to enter my giveaway! All comments must be posted by noon CST to qualify. And don’t worry, there are still a few more opportunities to get those last comments in before the deadline. I will have at least one new post every day this week.

Friday I will be announcing the winner – stay tuned!