Monday, April 26, 2010

Ode to (Papa) Joy

Once upon a time, many moons (ok, weeks) ago, I wrote a little blog post about neck bones and gravy.

Who would have guessed what a stir it would cause!! As it turns out, more than a few people I know have a strong opinion on the subject. There are a couple of my friends who couldn’t fathom the concept at all (and the idea of eating something’s neck pretty well grossed them out).There’s my Italian buddy, Mikey, who grew up eating them with cabbage instead of gravy...sometimes. There’s my southern friend, Whit, who had a similar experience and couldn’t imagine them being served with gravy, or pasta. And, along with Whit, there is her dad, (whom I will call “Papa Joy” - just because I think it’s fun) who was so enthralled with the idea of neck bones being served in this way that (from what I hear) he had a bevy of his co-workers gawking at my blog post in sheer wonder.

Papa Joy – this one’s for you.

And so, I vowed then and there, that the next time I could get my hands on some neck bones, there would be a throw down in my kitchen. Last week, while browsing the meat counter at my local grocer, I was delighted to see a large supply of gorgeous, meaty neck bones on display for a mere 69 cents a pound. You all know how cheap I am, so that made me plenty happy. I promptly scooped up four packages (about 14 pounds worth) and made my way home with my treasures.

That was the beginning. From there, I enlisted a few of our friends to come judge the resulting Smorgasbord of pork and all the little tidbits I set out with it.
I had Whit call home for her daddy’s recipe. I made a trip to St Louis’ Little Italy (aka, The Hill) for gorgeous olives, prosciutto di Parma, fresh parmesan cheese, some good wine, and a treasure trove of other delights.
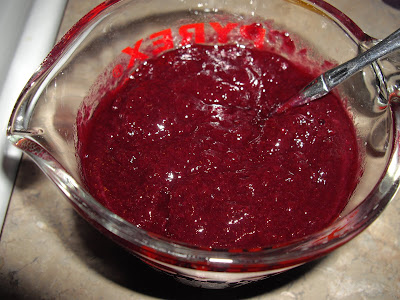
At about noon on Sunday, I began. Two trays of neck bones in front of me, they both began the same, seasoned with salt and pepper. The Southern Style bones also got some garlic powder and red pepper flake. Both batches were caramelized separately. The Italian bones were then removed and I sautéed onion, garlic and basil in the same pan, then deglazed with some Pinot Noir, tossed the bones back in and covered with crushed tomatoes, then set to simmer.
The Southern bones were covered in water seasoned with more salt, pepper, garlic and red pepper (disclaimer – I took a little creative license with Papa Joy’s recipe, but considering his daughter’s response to them, I don’t think he’ll mind.) On the same note, based on everything I’ve heard about him from Whit, I figured a little “grease” was in order, so I dipped into my supply of bacon fat for both the browning and the water. Later, when I told Whit about it, she said nonchalantly “well, yeah, that kind of goes without saying”, so apparently I was on the right track. And being on the “right track” was sheer luck, since my instructions consisted of “Season the water with salt, pepper and red pepper flake until it tastes like its right”. Since I had absolutely no experience with this, it was a crap shoot.
Both pots then go on to simmer until the meat starts to fall off the bone, which in this case was about three hours.
Near the end of the cooking process, I boiled some bucatini pasta for my Italian Bones,
and cooked some thick slices of cabbage in water (seasoned just like the water for the neck bones) to serve alongside the Southern bones.When Whit arrived, it looked like the scene of a catering job gone bad. The kitchen was a riot of smells, flavors, and....well....stains. The gravy was all over the place (my new stove only has one “simmer” burner, and the others just won’t stay low enough to keep sauces from boiling). However, the moment of truth arrived and her eyes lit up as she smelled the simmering bones.
“Oh man, I think you got it!” she said.(I may not have mentioned it before, but my dining room is "Hershey Bar" brown, walls and ceiling, so getting decent photos in there isn't easy. Its like being in a constant state of "mood lighting". That's my way of apologizing for the poor quality of these shots.)

That was all the encouragement I needed. I summoned the other judges (Mikey, JoJo, Feather, and the hubs) to the dining room and we tore into that buffet like we didn’t know where our next meal was coming from.
A whole roll of paper towels (and a fair amount of noises that would have been considered obscene under other circumstances) later, and none of us could decide which version we liked better. The devastation that was left at the end of the night made it look like there had been a war between an angry Italian woman and her kitchen. Oh...wait a minute.....that actually happened!
I wish I had been able to move afterward so that I could present you with the image of my kitchen table that will haunt me for the rest of my days (or, at least, until the next dinner party I host).
And so, in the end, the jury is still hung on which version is better. My personal opinion? Just serve both!
Special thanks to Whit’s dad (also known as Papa Joy) both for the recipe, and for putting up with me calling him “Papa Joy” throughout this post. I hope you enjoyed my rendition of one of your old favorites! (oh, and thanks for loaning us your girl...she’s a keeper!)

Tuesday, April 20, 2010

Cook the Books - Eating for England

After finishing our last selection for Cook the Books, "Like Water for Chocolate", I was eager to start on "eating for England" by Nigel Slater. Personally, I find it hard to get excited about food from the United Kingdom, but I am always open to trying new things and reading Slater's work was much like picking up an encyclopedia on food. While not incredibly entertaining, the book was quite educational. I learned a great deal about the cuisine of Great Britain, along with its people's favorite (and least favorite) indigenous prepared foods. It would be a great culinary reference guide for any true anglophile.

One thing the book did for me was make me want to try things I'd never tried before, although definitely not blood sausage.....

This may sound a little trite, but I decided to make soft boiled eggs. I do love eggs. I especially love runny yolked eggs. But, in my entire life, I have never had a soft boiled egg. For the beginner, its quite tricky getting the timing right for producing an egg whose white is cooked through, but leaves a liquid yolk. On the third try (I won't count the one I dropped into the water and cracked on contact) I had it just right. Technically, I had it perfect on the first try, but I wasn't expecting it and I cracked the egg right down the middle to test for doneness. Imagine my disappointment when I realized I could have used that one right off the bat!

I toasted my bread and sliced it into little "soldiers" just perfect for dipping. What a wonderful little comforting treat. I had the perfect little spoon that fit inside the egg perfectly for scooping out the whites after I had decimated the yolk.After making the egg, I decided that I couldn't be satisfied with merely boiling an egg, so I decided to make a small tribute to Harry Potter and made his favorite treat, Treacle Tart. (Of course, I had leftover Golden Syrup from the flapjacks I made recently, so I admit I had an ulterior motive.)

I managed to find a recipe that had measurement conversions on it, and only makes three small tarts, so I got to work! After finishing, I nearly inhaled one whole tart and had a hard time saving the other for my Brit-loving friend Melyssa to try. I think she was equally impressed. It tasted like a combination of pecan pie (without the pecans) and the very top crunchy bits on a creme brulee. I can see why Harry is so fond of it.
Caramel Treacle Tart
recipe adapted from Caramel by Trish Deseine
for 3 small 11x5 cm forms (I had two 11cm x 11cm forms, and used those instead of three of the smaller ones and it worked perfectly)

For the pastry: (I admit to cheating and using refrigerated pie crust)
Chilled butter, cut into cubes - 1/6 cups (37 ml)
All-purpose flour - 1/2 cup+1/8 cup (150 ml)
Soft brown sugar - 1 tablespoon (15 ml)
Chilled water - 1 tablespoon (15 ml)
Chilled vodka - 1 tablespoon (15 ml)

For the filling:
Golden Syrup (or Maple Syrup or Corn Syrup) - 1/3 cup (75 ml)
Butter - 3/4 tablespoon (10 ml)
Whipping cream - 1/6 cup (37 ml)
Egg, lightly beaten - 1

To make the pastry, mix the butter, flour, and sugar together in a food processor, or in a mixing bowl, using your fingertips to combine, until the mixture resembles coarse breadcrumbs.
Make a hollow in the center and pour in water and vodka (if not enough, add a little bit more vodka) to make a dough.
Shape into a ball, cover with plastic wrap and chill in the refrigerator for 15 minutes.- Roll out the pastry and use it to line the forms. Chill in the refrigerator for another 40-60 minutes.
Preheat the oven to 350F (180C) and put a baking sheet in the oven to heat up.
Gently heat the Golden Syrup in a small saucepan.
Add the butter and stir until the mixture is smooth.
Remove the saucepan from the heat and gently stir in the cream and the beaten egg. Be careful not to scramble the egg, if, however, egg white cooks a little, then pour the mixture through a fine sieve to get rid off the egg white lumps.
Pour the filling into the pie shell and bake for 30-35 minutes until the crust is golden brown and the filling has set.
Allow the tart to cool for a few minutes before serving with whipped cream.

Thursday, April 15, 2010

Loafing Around....

Although I consider myself to be pretty well-rounded in the kitchen, one thing I have not really experimented with very much is bread. Well, when we were preparing for Ginny's recent visit, she found two bread recipes from America's Test Kitchen that she wanted to try. And, as usual, nothing much stops us from following through with food plans, so away we went!

This is going to be a quick post with just a couple of pictures, but I think the gorgeous round loaves speak for themselves. I will say that we had a little trouble getting the dough to proof with the weather being fickle last weekend, so the bowl with the dough in it spent a little time on the warm dashboard of Ginny's car, and then the next loaf sat outside in the garden with us for awhile. Other than that, this bread was a breeze to put together. They turned out to be nice, dense loaves with a lot of flavor. I highly recommend giving it a try!

Almost No-Knead Bread with Olives, Rosemary, and Parmesan
from the Episode: Breadmaking, Simplified

An enameled cast-iron Dutch oven with a tight-fitting lid yields best results, but the recipe also works in a regular cast-iron Dutch oven or heavy stockpot. (See the related information in "High-Heat Baking in a Dutch Oven" for information on converting Dutch oven handles to work safely in a hot oven.) Use a mild-flavored lager, such as Budweiser (mild non-alcoholic lager also works). The bread is best eaten the day it is baked but can be wrapped in aluminum foil and stored in a cool, dry place for up to 2 days.Makes 1 large round loaf

3 cups unbleached all-purpose flour (15 ounces), plus additional for dusting work surface
1/4 teaspoon instant or rapid-rise yeast
1 1/2 teaspoons table salt
4 ounces finely grated Parmesan cheese (about 2 cups)
3/4 cup plus 2 tablespoons water (7 ounces), at room temperature
1/2 cup chopped green olives (pitted)
1/4 cup plus 2 tablespoons mild-flavored lager (3 ounces)
1 tablespoon white vinegar
1 tablespoon minced fresh rosemary

1. Whisk flour, yeast, salt, Parmesan, and rosemary in large bowl. Add water, olives, beer, and vinegar. Using rubber spatula, fold mixture, scraping up dry flour from bottom of bowl until shaggy ball forms. Cover bowl with plastic wrap and let sit at room temperature for 8 to 18 hours.

2. Lay 12- by 18-inch sheet of parchment paper inside 10-inch skillet and spray with nonstick cooking spray. Transfer dough to lightly floured work surface and knead 10 to 15 times. Shape dough into ball by pulling edges into middle. Transfer dough, seam-side down, to parchment-lined skillet and spray surface of dough with nonstick cooking spray. Cover loosely with plastic wrap and let rise at room temperature until dough has doubled in size and does not readily spring back when poked with finger, about 2 hours.

3. About 30 minutes before baking, adjust oven rack to lowest position, place 6- to 8-quart heavy-bottomed Dutch oven (with lid) on rack, and heat oven to 500 degrees. Lightly flour top of dough and, using razor blade or sharp knife, make one 6-inch-long, 1/2-inch-deep slit along top of dough. Carefully remove pot from oven and remove lid. Pick up dough by lifting parchment overhang and lower into pot (let any excess parchment hang over pot edge). Cover pot and place in oven. Reduce oven temperature to 425 degrees and bake covered for 30 minutes. Remove lid and continue to bake until loaf is deep brown and instant-read thermometer inserted into center registers 210 degrees, 20 to 30 minutes longer. Carefully remove bread from pot; transfer to wire rack and cool to room temperature, about 2 hours.
Almost No-Knead Cranberry-Pecan Bread
3 cups unbleached all-purpose flour (15 ounces), plus additional for dusting work surface
1/4 teaspoon instant or rapid-rise yeast
1 1/2 teaspoons table salt
1/2 cup dried cranberries
1/2 cup toasted pecan halves
3/4 cup plus 2 tablespoons water (7 ounces), at room temperature
1/4 cup plus 2 tablespoons mild-flavored lager (3 ounces)
1 tablespoon white vinegar

1. Whisk flour, yeast, salt, cranberries, and pecans in large bowl. Add water, beer, and vinegar. Using rubber spatula, fold mixture, scraping up dry flour from bottom of bowl until shaggy ball forms. Cover bowl with plastic wrap and let sit at room temperature for 8 to 18 hours.2. Lay 12- by 18-inch sheet of parchment paper inside 10-inch skillet and spray with nonstick cooking spray. Transfer dough to lightly floured work surface and knead 10 to 15 times. Shape dough into ball by pulling edges into middle. Transfer dough, seam-side down, to parchment-lined skillet and spray surface of dough with nonstick cooking spray. Cover loosely with plastic wrap and let rise at room temperature until dough has doubled in size and does not readily spring back when poked with finger, about 2 hours.

3. About 30 minutes before baking, adjust oven rack to lowest position, place 6- to 8-quart heavy-bottomed Dutch oven (with lid) on rack, and heat oven to 500 degrees. Lightly flour top of dough and, using razor blade or sharp knife, make one 6-inch-long, 1/2-inch-deep slit along top of dough. Carefully remove pot from oven and remove lid. Pick up dough by lifting parchment overhang and lower into pot (let any excess parchment hang over pot edge). Cover pot and place in oven. Reduce oven temperature to 425 degrees and bake covered for 30 minutes. Remove lid and continue to bake until loaf is deep brown and instant-read thermometer inserted into center registers 210 degrees, 20 to 30 minutes longer. Carefully remove bread from pot; transfer to wire rack and cool to room temperature, about 2 hours.

Bake Sale - Samoa Brownies and Pepperoni Puffs!

Last week we were asked my a co-worker at our other office to participate in the department's bake sale to raise money for their annual Christmas charity project. Bake? Me? Really? Gee, I dunno....that might be pushing it....not.

So, we talked to the group and got a whole crew of people baking. This morning we see the fruits (and sweets) of our labors making money hand over fist in our main lunchroom. I hadn't even sent out the email that it was ready and people were hovering over the display of goodies and treats...cash in hand.

I was concerned that we weren't going to have enough participation, so I made a few things to bring in. As it turns out, I needn't have worried. Not only did the tables fill up, but we had to add a third table to hold it all.

My first selection was an encore performance of the Orange Bundt Cake I made last week that was so well received.

In addition, I made another recipe I've had in my "Must Try" file for quite awhile now. Samoa Brownies. These are a take on the famous Girl Scout cookies, known here as Samoas, and in other parts of the country as Caramel Delites. These were the very first item snatched up in the feeding frenzy this morning.

Samoa Brownies 1 brownie mix (I used 2 mixes and made it 9x13 instead of 8x8)
3 1/2 cups shredded coconut
(2) 14 oz. package of caramels, unwrapped (I used the Kraft Caramel Bits so I wouldn't have to unwrap anything)
1/2 tsp. salt
4 tbsp. milk
3 oz. semi-sweet chocolate

Prepare brownie mix according to box directions. Cool.
Place the caramels, salt, and milk in a microwave safe bowl and cook on high for 3-5 minutes. Stop occasionally to stir. Cook until all caramels are melted and smooth.

Add coconut and mix together. Spread over cooled brownies. (since the packages of Caramel Bits are 11 ounces and the recipe calls for 14 ounce bags of caramels, and considering that I was making a larger pan, I used 3 bags of bits. As it turns out, I think two would have been plenty. They were almost TOO caramelly. is that a word?)

Refrigerate 4-5 hours or overnight. Remove at least 1 hour from the fridge before cutting. Cut into bars and drizzle with melted semi-sweet chocolate.

I was also thinking that with all the sweets that were bound to be on the table, it would be nice to have something savory. And, as it happened, I got one of my regular Rachel Ray email newsletters and saw a recipe for Pepperoni Pizza Puffs. These little babies were perfect. I did not make the sauce for dipping them, as Rachel suggests. Instead I just baked the puffs and served them solo. They were quite a hit as well, and super easy to make. I actually put them together from start to finish this morning before coming in to work. (also, I made a double batch) They turned out great, and were one of the first dishes to turn up empty this morning!

Pepperoni Pizza Bites3/4 cup flour
3/4 teaspoon baking powder
3/4 cup whole milk
1 egg, lightly beaten
4 ounces mozzarella cheese, shredded (about 1 cup)
4 ounces pepperoni, cut into small cubes (about 1 cup) this sounded like it would be a pain in the neck, so I bought a log of pepperoni and took my mandoline to it, making thin little slices instead of cubes.
1/2 cup store-bought pizza sauce
2 tablespoons finely chopped fresh basil
1 red bell pepper, sliced
Preheat the oven to 375°. Grease a 24-cup mini-muffin pan. In a large bowl, whisk together the flour and baking powder; whisk in the milk and egg. Stir in the mozzarella and pepperoni; let stand for 10 minutes.
Stir the batter and divide among the mini-muffin cups. Bake until puffed and golden, 20 to 25 minutes.

Wednesday, April 14, 2010

I Heart Cooking Clubs - Pantry Raid!!!

Ok, I have to honestly say that when I was talking about this week's theme for I Heart Cooking Clubs, my husband really thought I said something entirely different. He was a tad bit confused when I started breaking out fish filets and large quantities of butter.

For this week's theme, the idea is to make something using your pantry staples. Well, my idea of what constitutes a "pantry staple" may differ from others, but one thing that there is never any lack of in my house is butter. Hellooooo.... we live in the country, its a staple. While I was trying to decide what to make for this particular theme, Ginny texted me from her local co-op where she had just found fresh rainbow trout, a new favorite of ours since attending a cooking class last year. Once we knew we had the fish, the whole plan came together.

And no, I am not trying to claim that rainbow trout is a staple, but it IS the vehicle for my selection for this week's IHCC theme!

In my neck of the woods, it is commonly understood that "everything is better with butter" (and bacon, but that's another post entirely). In my house, in particular, it only gets better when you make it a "compound" butter, meaning you add lovely flavors to it. Most commonly you see this in some variation of a garlic butter.

In Bittman's "How To Cook Everything", he has a number of compound butters listed, and we decided to try three of them, and have a throwdown to decide which was our favorite by gently pan frying the rainbow trout filets and dressing them up with the finished butters. For each of the butters, we just brought the butter to room temperature so it was nice and soft, mixed in the ingredients, and then chilled to solidify. I know you may be thinking that some of the ingredients below may be a stretch when referring to pantry staples, but if you've ever been to my kitchen or are aware of my love affair with Penzey's spices.....well, you'd understand.
(clockwise from the top - Mustard Butter, Wasabi Butter, Ginger-Lime Butter)
Wasabi Butter
4 ounces butter
1 tsp wasabi powder (we used 2 teaspoons, because one just wasn't enough.)

Ginger Lime Butter
4 ounces butter
1 TB fresh grated ginger
1 TB lime juice (we also added the zest from the lime, for extra punch)

Mustard Butter
4 ounces butter
1 TB mustard (we used the Guinness mustard that Ginny made recently)

These butters can be kept in the fridge for a week, or indefinitely, depending on the ingredients you use. We doubled each recipe so we would both have leftovers to keep in our respective fridges.

Now, for the results!!!
We lightly seasoned four trout filets with salt and pepper and gently pan fried them, skin side down first, until the fish was opaque and flaky. We topped three of the filets with one of the butters, and then, since the last little filet looked sad and lonely, we slapped a dollop of our favorite butter on it so that it would be happy before we scarfed it down.And our favorite was? The Ginger Lime!It was bright and flavorful (really glad we added the zest) and it had enough staying power to hold up throughout the dish. The other two butters were good, but may have been better suited for different dishes. While both the mustard and wasabi butters were tasty, we felt they fell flat when used on the clean slate of the fish. I may have to try the wasabi butter on some popcorn later this week, and the mustard on a nice steak, hot off the grill, this weekend.

The basic concept here is that you can add anything to butter, so give it a try! I can promise you won't be disappointed.

Monday, April 12, 2010

The Asparagus Shelf

It must have been a real challenge to have been my grandmother. My father's mother, Mary Ruth, was an incredible woman. I mean, you'd have to be, if you had fourteen children and raised them all to be outstanding individuals, like she did. Yes, you heard me right, I said FOURTEEN. And no, they were not at all like the Duggar family. My grandparents were good, catholic people who happened to have a lot of children. And I am really glad they did, or I wouldn't be here today.

So, as you can imagine in a house of fourteen children, there are a lot of stories to tell. I've heard about all kinds of sibling issues and every day drama that occurred regularly in my father's home. One of the stories that will always stick out in my mind is the story of the Asparagus Shelf. One thing (as my father tells me) that you learn in a family that size is to take what you want from the serving plate on the first time around the table, or you may not get it. Likewise, you have to figure out what to do about food you would rather NOT have on your plate.

The family dinner table had a secret hiding place. I imagine it as some kind of support for the table legs. My dad calls it the "asparagus shelf", because that is where all those nasty kinds of things ended up when Grandma and Grandpa weren't looking.

I, personally, adore asparagus, but I imagine that possibly they didn't practice the "steaming" method back then, so I suppose I can understand my dad's dismay when the wilted greens made an appearance at the dinner table. However, I can understand the sentiment. See, I have always felt that way about brussels sprouts. I have tried and tried, but I have never once been able to convince my taste buds that they are a special culinary treat.

Apparently, I have just never had them prepared the right way. Ginny came out this past weekend while she was at a conference in St Louis, and brought with her a baggie of pretty little brussels sprouts she brought from her parents' house. She assures me that size does matter when it comes to brussels sprouts; and smaller is better.

We made this recipe that we found over at Evil Chef Mom, and to say the least, it was a revelation. Really, people, I would not lie about something so serious. Working diligently, Ginny trimmed and cored the little gems and then passed them to me to tease the little leaves apart. (The recipe says to slice them, but we went in a different direction.) After finishing the dish, and taking lovely pictures of it for all of you to see, we both grabbed a fork, and with a prayer of "I really hope this is good", we dug in. Standing right there, over the stove. We stood. And devoured. If I could have fit one more shovel full down my gullet, I would have licked the bowl. This is all that was left after what shall henceforth be known as "The Brussels Sprout Massacre".
(you should know that this is NOT a small bowl. This is a 12" platter. And it is EMPTY.)
I have been converted. As evidence to that point, we went to the greenhouse the next day and there are now four brussels sprouts plants residing in my garden. For once I can say that its alright that my husband would never eat this, because the next time I make it, I won't have to share it with anyone. And, oh yes, I will be making it again.

Brussels Sprout Hash With Caramelized Shallots and Bacon
(Adapted from Bon Appetit November 2007)
6 tablespoons (3/4 stick) butter, divided
1/2 pound shallots, thinly sliced (I only had 2 shallots, so we used those and a few pieces of green garlic)
1/2 pound bacon, cut into 1 inch pieces (we used pancetta)
Coarse kosher salt
2 tablespoons apple cider vinegar
4 teaspoons sugar
1 1/2 pounds brussels sprouts, trimmed
3 tablespoons extra-virgin olive oil
1 cup water

In a frying pan, cook bacon until crispy. Lay bacon on paper towels to drain fat.

Melt 3 tablespoons butter in medium skillet over medium heat. Add shallots; sprinkle with coarse kosher salt and pepper. Saute until soft and golden, about 10 minutes. Add vinegar and sugar. Stir until brown and glazed, about 3 minutes.
Halve brussels sprouts lengthwise. Cut lengthwise into thin (1/8-inch) slices.Heat oil in large skillet over medium-high heat. Add sprouts; sprinkle with salt and pepper. Saute until brown at edges, 6 minutes. Add 1 cup water and 3 tablespoons butter. Saute until most of water evaporates and sprouts are tender but still bright green, 3 minutes. Add shallots and bacon, season with salt and pepper.
Make it. Love it. Devour it. Then make it again. You know you want to....

Thursday, April 8, 2010

Orange Cake

As I'm sure many of you do, I keep an ongoing file of recipes I see on other blogs, recipe sites, and other places that I really, REALLY want to try at some point. Some of them I get around to making, others sit there for what seems like an eternity.

With the weather turning to spring, I have started shying away from baked goods and other heavy foods again, so many of those recipes will sit there for yet another season, until I get in the mood to bake again.

Until now.

See, my department at work is having a bake sale fundraiser. Oh, gee, darn.... So, yes, you know me, I dragged out the recipe file and started sifting through it. I came up with five recipes that are contenders for the honor of being in the bake sale. Unfortunately, now that I know I'm baking next week, I'm having a hard time waiting.

See, here is how my mind works. Whatever I make, I am supposed to divide it out into individual size containers to sell for a "donation". Well, one of the recipes on my list was for a bundt cake. And yeah, I can't really see a good way of dividing that out into smaller portions. How much do you put on the plate? One slice? Three? The whole damned thing??? My brain refuses to wrap itself around the concept, so I went ahead and made the cake last night, using the rationale that:
a. The ingredients are cheap, so if it turns out well, I can justify making it again;
b. What if it doesn't turn out well? At least this way I'll know before its too late (yes, I know, this doesn't account for the OTHER four recipes I haven't tried yet). And, finally;
c. What kind of co-worker would I be if I made a bunch of stuff for the bake sale but didn't bring a special treat in for my department to nosh on while we're selling off everything else that we made, right? RIGHT???

Yes, I know, its a weak argument. I made the cake anyway. It was super easy, just a handful of ingredients in one mixing bowl. Just make sure you grease your bundt pan thoroughly so that it doesn't stick like mine did (I did an excellent job of hiding it in the photos, don't you?).

The glaze is not really a glaze, as much as a "drench". It didn't harden up like a powdered sugar-based glaze would have. Instead, it served to moisten the cake even further. Check this out....

Talk about an ORANGE cake. This one was moist and flavorful, and very VERY "springy"! So I guess it was a compromise between baking and warm weather. My department girls will be very pleased with this one, I think.

Orange Cake
Makes 1 10-inch bundt cake
1 (18.25 ounce) package yellow cake mix
1 (3 ounce) package instant lemon pudding mix
3/4 cup orange juice
1/2 cup vegetable oil
4 eggs
1 teaspoon lemon extract (I used orange. Duh, its an "orange" cake, right?)
1/3 cup orange juice
2/3 cup sugar
1/4 cup butter

Grease a 10 inch Bundt pan. Preheat oven to 325 degrees F (165 degrees C).

In a large bowl, stir together cake mix and pudding mix. Make a well in the center and pour in 3/4 cup orange juice, oil, eggs and lemon extract. Beat on low speed until blended. Scrape bowl, and beat 4 minutes on medium speed. Pour batter into prepared pan.Bake in preheated oven for 50 to 60 minutes. Let cool in pan for 10 minutes, then turn out onto a wire rack and cool completely.

In a saucepan over medium heat, cook 1/3 cup orange juice, sugar and butter for two minutes. Drizzle over cake.

Bites of Bittman - Warm Salad of Scallops and Tender Greens

Welcome to the new edition of I Heart Cooking Clubs! We spent the last six months cooking up recipes straight from and inspired by Nigella Lawson. For the next six, we'll be discovering the minimalism of Mark Bittman. As soon as I heart who our next subject was going to be, I immediately ran out (okay, hopped online) and picked out a couple of his books to use for reference.

My first selection was Bittman's How To Cook Everything, and let me tell you something....I may never need another cookbook.

Okay, so that's a little unrealistic.

But really, I didn't even make it through the appetizers and salad sections when I had to close the book. Because I wanted to make....EVERYTHING. Practically every single entry sounded good to me. How To Cook Everything is less a cookbook and more an instruction manual. The recipes are so simple that you feel more like you are dressing the plate instead of cooking a meal. The methods are so basic and clear that I would recommend this book to even the most freshman cook. Although the book is intimidating at first glance (ie, its bigger than my family bible), it only takes a few pages for you to realize that it is anything but.

*stepping down off the soapbox*

Okay, so lets get back to the food! Our first week's theme is "Bites of Bittman", meaning any small plate or starter. As Bittman indicates in the introduction to the appetizer section, most of the dishes in the book can be prepared as a starter, and, in fact, pasta is generally served as a first course in Italy (that's a man after my own heart). While I had a difficult time choosing a recipe to start with, I decided to go with this one simply because scallops are quite possibly my all time favorite seafood. Oh, that and I had a bag of sea scallops in the freezer.

Warm Salad of Scallops and Tender Greens
makes 4 servings
Time: about 15 minutes
2 tablespoons freshly squeezed lemon juice
3 tablespoons peanut or other oil (I used olive)
1 tablespoons minced shallot
1 tablespoon water (I used white wine...since, you know, I had a glass handy)
salt and freshly ground pepper to taste
1 pound sea scallops, cut in half horizontally
6 cups torn tender greens (I used a nice herb mix of baby greens)

1. Whisk together the lemon juice, 1 1/2 tablespoons of the oil, the shallot and the 1 tablespoon of water in a small bowl. Season with salt and pepper.

2. Heat the remaining oil in a large, non-stick skillet over high heat. Add the scallops and sear until golden, 2-3 minutes per side.

3. Toss the greens with half of the dressing in a large bowl. Divide the salad among four plates, arrange the scallops over the salad, and drizzle the remaining dressing over them. Serve immediately.


Notes: For my purposes, I made less than half the recipe, since I would be the only one eating it last night. I do love me some scallops, and even though the recipe doesn't say anything about seasoning the scallops themselves, I couldn't keep myself from adding a little salt and pepper before searing them. I loved that the scallops straight out of the pan had a slight wilting effect on the greens and warmed the dressing somewhat. The flavors were complementary, subtle, and....kinda boring. Yes, I said it. Don't get me wrong, it was a very good salad. All I'm saying is that next time, I'll add some sesame oil or some red pepper, or some fresh herbs, or, well, SOMETHING to the dish to make it pop a little more. Definitely a salad I would eat again, with minor modifications. (and yes, if you were wondering, I did clean my plate.)

Tuesday, April 6, 2010

Grape Juice Tart - a Guest Post from Ginny!

Good Morning, everyone! I have a special treat for you today, in the form of a guest post. You hear me talk about my friend Ginny all the time, and after my post about my adventures with Limburger cheese, you are probably feeling like you are getting to know her pretty well.
Well, this weekend, Ginny made an absolutely fabulous dessert and I told her she simply had to share it with all of you, right here on my blog. So, without further ado, I’m turning this post over to Ginny.

Ever have something that you love, and yet you wonder what to do with it? That’s where I was. I had grapes last summer from the family vines that I had cooked down, run through the food mill and then placed into the freezer. Typically this stuff gets made into jelly or jam in my family, but since I try to avoid carbs in general, having jelly to put on bread is a bad thing. I wanted to do something else, I just didn’t know what. The freezer is a wonderful thing, it lets you put things off, procrastinate really, something I do very well.
So, while searching Tastespotting, I found a recipe for a grape juice tart. Hmmmm, that sounds interesting! And oddly, it calls for the exact amount of juice waiting for me in the freezer. I have a frozen pie crust waiting to be used also. It’s Kismet!
I made it in time to take to my parent’s home to try out for my nephew’s birthday party. Now, I’ve mentioned before that my family is somewhat leery of new things. But I figure its grape, and my family likes jelly (they make their own), so how wrong can I go. My brother, niece, and nephew wouldn’t try it. Eh, I expected some hesitancy. Mom and Dad thought it was okay. Dad called it interesting, which means I don’t need to bother making it again on his behalf. Mom had a little more when we were having birthday cake. I liked it; it was very grapey without being cloyingly sweet. My soon to be nephew (the niece’s fiancĂ©), Justin, loved it. He ate a quarter of it, refused birthday cake, and asked how much of what was left I was willing to part with. LOL! He ended up with another quarter of the tart to take home. We also discussed what it would be like with other flavors, and since he is a fan of peach, I may try to find peach nectar and make it for his birthday dinner in a couple of weeks. All in all, a win in my book.

Ingredients:
For the short crust pastry:
generous 1 1/4 cups all purpose flour
1 tbsp sugara pinch of salt
45 gm cold butter, diced
2 to 3 tbsp cold water

For the filling:
1 liter dark (or white) grape juice
150 ml milk (3%)
180 ml cream (25% fat)
3 tbsp all purpose flour
1 1/2 tbsp corn starch
1 tbsp butter
1 egg, whisked
2 tbsp sugar (adjust to requirement)
1 1/2 tsp vanilla extract

Method:
Make the crust:
You can do this by hand or in the food processor. I find the food processor excellent for making pie/ tart dough. Sift the flour into a bowl. Add the butter and rub with fingertips into the flour, till the mixture resembles coarse bread crumbs.
Add 2 tbsp water and using your hands, bring the dough together adding a little water if necessary. Too much water will result in a tough pastry.
Turn the dough onto a lightly floured work surface and knead briefly till dough is smooth. Form into a neat ball, flatten into a round, wrap in cling film and chill for at least 30 minutes.
Remove pastry from the fridge and place on lightly floured surface and roll out into a circle about 12” in diameter, slightly larger than a 9” fluted pastry ring/ dish. Roll the pastry in a back and forth motion and do not stretch or pull the pastry.
Place the pastry circle in the ring/ dish and carefully press to the edges, removing excess pastry with a knife. Lightly prick the base with a fork. Chill for about 20 minutes.
Remove from the fridge and line the pastry with foil or waxed paper, and fill with baking beans.
Bake at 200C for 12 minutes. Remove the foil/ waxed paper and put the crust back in the oven for another 10 minutes till golden brown.
Cool on a wire rack.

Make the filling:
Pour the grape juice (one litre) into a pan and bring to a boil. Then turn down the heat to low-medium and simmer, while stirring frequently, till it has reduced to 150 ml. Once the juice has reduced to roughly 1/3rd, watch the pan and its contents or you will end up with a burnt liquid! Let this cool to room temperature. Put the milk, cream, cornstarch and flour into a pan. Mix well, and cook the mixture over medium heat till it becomes a smooth and thick paste.Add the butter and mix well. Let this cool.
In a small bowl, whisk the egg, sugar and vanilla extract. Add to the cooked and cooled mixture.Mix well. Now add the reduced grape juice and mix well.You might find your tart filling seems a little granular but that’s fine.

Assembling the tart: Pour the filling into the tart shell and bake at 200C for about 40 minutes.The filling will have set well. Do not be tempted to cook for longer or the texture of the filling will change.Cool the tart well before slicing. Serve with whipped cream or mascarpone cheese. This tart serves 8 to 10.
Cooking notes:
First and foremost, please make sure to convert accurately, I managed fine with the metrics, as a nurse I use the metric system regularly. But for some reason I forgot to convert Celsius to Fahrenheit for the oven temps. I caught this midway through blind baking the crust.
I started out with homemade unsweetened grape juice with pulp. This contains pectin. When I was cooking it down I was pretty sure that it was going to get thick long before I made it down to the 150 ml reduction. I was right; I made it down to just over the 250 ml mark on my measuring cup. I only added about ¼ cup sugar after it was well into the reduction process. I had essentially made jelly. It actually tasted pretty good. Any further attempts at reduction and I would have had taffy. This makes me think that starting out with bottled juice may give different level-of-sweetness results.
So when it came to the “white sauce” I was pretty sure I didn’t want to cook it down to the thick paste consistency the recipe called for. I also used half and half instead of the milk/cream combination. I pulled it from the heat when I started to see the bottom of the pan when I pulled the spatula across the pan. When I added the “grape juice” into the bowl it was still a little thick, so I ended up adding a little more half and half to loosen it up a bit. Considering the increased volume I was worried about over filling the crust, but only slightly, because I tasted the filling to make sure the sugar level was appropriate and it tasted like grape cream – YUMMY! I risked the whole raw egg thing and licked the spatula. It was also this lovely lavender color.
Also, I used an 11 inch tart pan, which resulted in a more shallow tart. (Because that’s what I had!) I don’t think it affected the outcome.
I watched closely in the oven, because I was concerned about the thickening issue and was worried it might either boil over, or seize up and turn to taffy in the crust. No worries, it turned out great! A nice puddingy consistency.

Thursday, April 1, 2010

I must love my dad, or I wouldn't have done something so stupid.

Prepare for a lot of swearing....

This post started out as a kind of tribute to my dad, and I'll give you a little background on it, but then I'm going to let my girl Ginny take over on the telling of the story, because, frankly, I think I've got some kind of post traumatic stress blocking it from my memory....

See, my dad comes from a good Catholic family with 13 siblings (that's right, my grandma had 14 kids. She's my hero.) As you can imagine, she had to be creative when it came to feeding the family, particularly during Lent, when she couldn't serve meat. My dad has told my sister and I many times about the things he used to eat on Fridays in Lent, and recently I decided that I needed to do a post about his special little sandwiches that I've been hearing about my whole life. The first was Peanut Butter and Mayonnaise on white bread. Ok, nothing too weird there. The second one was Cheez Whiz with olives. Interesting...I'm open minded, and willing to give it a try. And finally, the one that defies explanation....Limburger and Onion on Pumpernickel. Where they came up with this one, I have no idea, but my dad tells me that he and his co-worker used to pack these to eat on Fridays in Lent. To say the least, I had a hard time imagining anyone wanting to eat this, let alone two people together...although I have to say that much like garlicky foods, eating it WITH someone else is the only way to do it.

So, I gathered the collective ingredients and prepared for the event.

And here, my dear readers, is where I must leave you. Ginny will be taking over the telling of the adventure that was my dad's sandwiches, as she can remember it much more clearly than I can at this point.

Hi everyone! It's me Ginny. Before I start telling this story, I have to give a short disclaimer. There WILL be profanity in this post. You may, in fact, learn words you never knew could come out of Beth's mouth.

So, as you can imagine, if you know Beth at all, she put off working on this post for quite awhile, just never quite getting around to doing it until her ingredients were all approaching their respective expiration dates. She had every intention of taking the supplies with her to Baltimore and making it a family event, but thankfully she didn't, since everyone in the house ended up with the stomach flu during that visit, and you'll understand why that makes a difference in a minute. She even brought the stuff to my house, and I'm not sure, but I think I'm glad we didn't get to it here. I say that only because it may have been funnier in person (although I don't know how).

After having a crazy couple of days this weekend, and several hours at a 5-year-old's birthday party; she was exhausted, but determined to cross this one off her list. So, naturally, she called me for moral support, as she often does when she is about to cook something she thinks is going to be monumental in one way or another. After setting the scene, and her work space; she dialed me up and put me on speaker before clipping the phone to its place above the counter so I could "observe" the proceedings.

It all began innocently enough....starting small with the peanut butter and mayo (By the way, her original intention was to "dress up" her dad's sammies, giving them a new look from the new generation, so to speak. So, she designed them as different sorts of tea sandwiches, as you'll see in the final picture). Moving on from there, she started slicing olives and assembling a double-decker version of the Cheez Whiz and Olive. Saving the "best" for last, she began tearing open the package of Limburger. And that's when all hell broke loose. Its really a shame Beth didn't have the foresight to record the actual event, as I cannot possibly do justice to the humor that ensued (at least, it was humorous to me...not so much to Beth).

Beth: oh my god...it is SUPPOSED to look like that? OH! Sweet Mother!!! What is that SMELL???
Me: *smiling patiently* THAT would be LIMBURGER.
Beth: Well...DAMN....is it supposed to have that funky-assed coating on it? I mean....GROSS!
Me: *chuckling*
Beth: Really though, its not expired...how the hell are you supposed to know when this shit has gone bad??? Oh MAN! What the hell!!!
Me: *laughing now*
Beth: Ok, I don't care if its supposed to be on there or not, I'm cutting that nasty shit off...ohmigod...that is disgusting....who the hell would think it was a good idea to eat this???
Me: Yeah, I remember my granddad eating that when I was a kid and I had to leave the room...
Beth: SERIOUSLY!!! Oh damn....after this is over, I am throwing the rest of this away...I don't care that this little chunk cost $5...and why the hell is it expensive???
Me: (keep in mind, we both LOVE stinky cheeses...but still) *full on snort-laughing*
Beth: Ok, I'm just going to make the sandwich and be done....oh holy hell..it smells like FEET!!!
Me: Or like ass....
Beth: I would say that but I think my ass would be offended!!! *gag* oh hell...I don't know if I can do this...
Me: *uncontrollable laughter*
Beth: You think this is funny? Be glad we didn't manage to get this done at YOUR house last weekend!!!
Me: *thanking God we managed to put that off too long to get it done at my house*
Beth: I don't think I'm going to be able to try this....I'm going to have to change the title of the post to "Dad, I apologize".... OH!! GODDAMN!!! I think it just bit me!!! Ugh...*gagging* I have to wash my hands...
Me: *uncontrollable laughter* (egging the situation on...) Seriously, you're going to make it, and not try it? That hardly seems fair.
Beth: I think its contaminating the other sandwiches.....OMG I am so throwing this stuff away, but I'm either going to have to take the trash out or seal it in a Ziploc....I cant leave this stench in my house...OHMIGOD!!! I licked my finger!!! Dammit!!!
**rustling noise as she grabs a Ziploc**
Beth: Oh CRAP!!! That just effing figures! I try dumping it from the garbage bowl into the bag and most of it ended up on the floor!!! Ewwww now I'm going to have to wash the rug....now I have to touch it again!
**carefully picking the waste up off the floor, nose running**
Me: *laughing so hard I'm barely breathing*
Beth: Ok, its done...I'm gonna wash my hands again and take pictures so I can throw the rest of this shit away....
Me: *can't breathe...laughing so hard*
Beth: *pause* Ok, I washed my hands....*click* *click*...*taking pictures* That's it, I can't stand it anymore....ok, just so I can say I did it and before I can change my mind, I'm going to take a bite...I have a full beer here to wash it down with....
**dramatic pause**
Beth: Damn...I was just getting ready to say it isn't as bad as it smells.....but its growing....oh hell...where's the beer???
Me: Didn't you learn anything from wine tasting? Start with the mild ones and work your way up! Why didn't you start with the peanut butter ones???
Beth: I figured I'd need something to help wash the taste away... oh hell...I can't believe I did that...*cough* it just won't go away....
**chucking rest of sammie into Ziploc bag and re-washing hands**
Beth: Ok, I can at least say I did it, but damn...I don't know what the hell I was thinking....WHY WOULD PEOPLE EAT THAT??? I mean, I barely tasted that and they used to eat whole sandwiches of it!!! SHIT! I licked my finger again!!!! I WASHED MY HANDS, how can it still be there?!! Me: *ROFLMFAO*
Beth: Ohmigod...its in a Ziploc and I'm still gonna have to take the trash out...I think its trying to eat its way out of the bag....okay, I have to wash these dishes before the nasty shit grows legs and wanders off....I'll call you back....

And THAT, is how Beth learned what Limburger is. I really wish you could have been there...my stomach hurt from laughing....if we had that on video we could have won some serious money on America's Funniest. From what she tells me, not only is the smell STILL on her fingers, but at some point during the night last night, she woke up and swears there was a little green swirl of stink lingering over her bed, laughing at her....

Ok, its me again....I have to say, I'm really glad Ginny was on the phone to tell the story, because I have blocked out the entire event. Dad, I apologize, I love you....but damn. We must have a little bit of "crazy" in the family, because I don't know how you ever ate that once, let alone repeatedly, and lived to tell the tale...

On the upside, I actually kind of liked the Cheez Whiz and Olive sandwich. The peanut butter and mayo was fine, nothing too exciting either way there.

So folks, there it is. My Lenten tribute to my dad, who I do love dearly, but never....EVER....will I do something like that for him again. Trust me on this one....My kitchen will never be the same....I think its still mad at me. I'm going to have to burn candles every day for the next month to make up for it.

And just so I can prove it actually happened, here are the pictures.

And no, if you're wondering....this is NOT an exaggeration....its a cautionary tale....learn from my mistakes....please....